Google Chat

Version: 2.2
Updated: Sept 25, 2025
Google Chat is an intelligent and secure communication and collaboration tool, built for teams.
To send rich text messages, use the Create Message action with Disable HTML in the message body. Follow the directions in the Google Chat documentation.
Actions
- Create Message (Notification) - Send messages privately to a specific Chat user.
- Delete Message (Containment) - Delete a message that the Chat app sent.
- Get Member (Enrichment) - Get details about a membership in a space.
- Get Message (Enrichment) - Get details about a message.
- Get Space (Enrichment) - Get details about a space.
- List Members (Enrichment) - Lists memberships in spaces that the Chat app has access to.
- List Spaces (Enrichment) - Lists spaces that the Chat app has access to.
- Update Message (Containment) - Update the message.
Google Chat configuration
Our Google Chat integration support two types of authentication, Service Account and WIF (Workload Identity Federation). We recommend using WIF since it is more secure and easier to manage. For more information, see Workload Identity Federation.
Required AWS details from Sumo Logic
To configure the Google Chat integration using WIF authentication, you need the following AWS details from Sumo Logic. These details are essential for setting up the Workload Identity Federation (WIF) credentials in Google Workspace:
- Deployment name is the unique name of your Sumo Logic deployment, for example,
dub,fra, etc. - Sumo Logic AWS account ID:
926226587429 - Sumo Logic AWS role:
<deployment_name>-csoar-automation-gcpiam - Sumo Logic AWS Lambda function:
<deployment_name>-csoar-automation-gcpiam - Full ARN:
arn:aws:sts::926226587429:assumed-role/<deployment_name>-csoar-automation-gcpiam/<deployment_name>-csoar-automation-gcpiam
Workload Identity Federation (WIF) authentication
To create WIF credentials in Google Workspace needed to configure the Google Chat app integration, follow these steps:
- Log in to the Google Cloud portal.
- Select a Google Cloud project (or create a new one).
- Go to the API&Services
- In the same page click on ENABLED API AND SERVICES and search for Google Chat, Cloud Resource Manager API, IAM Service Account Credentials API, Identity and Access Management (IAM) API, Security Token Service API and enable it all.
- Go to the IAM & Admin > Service Accounts page.
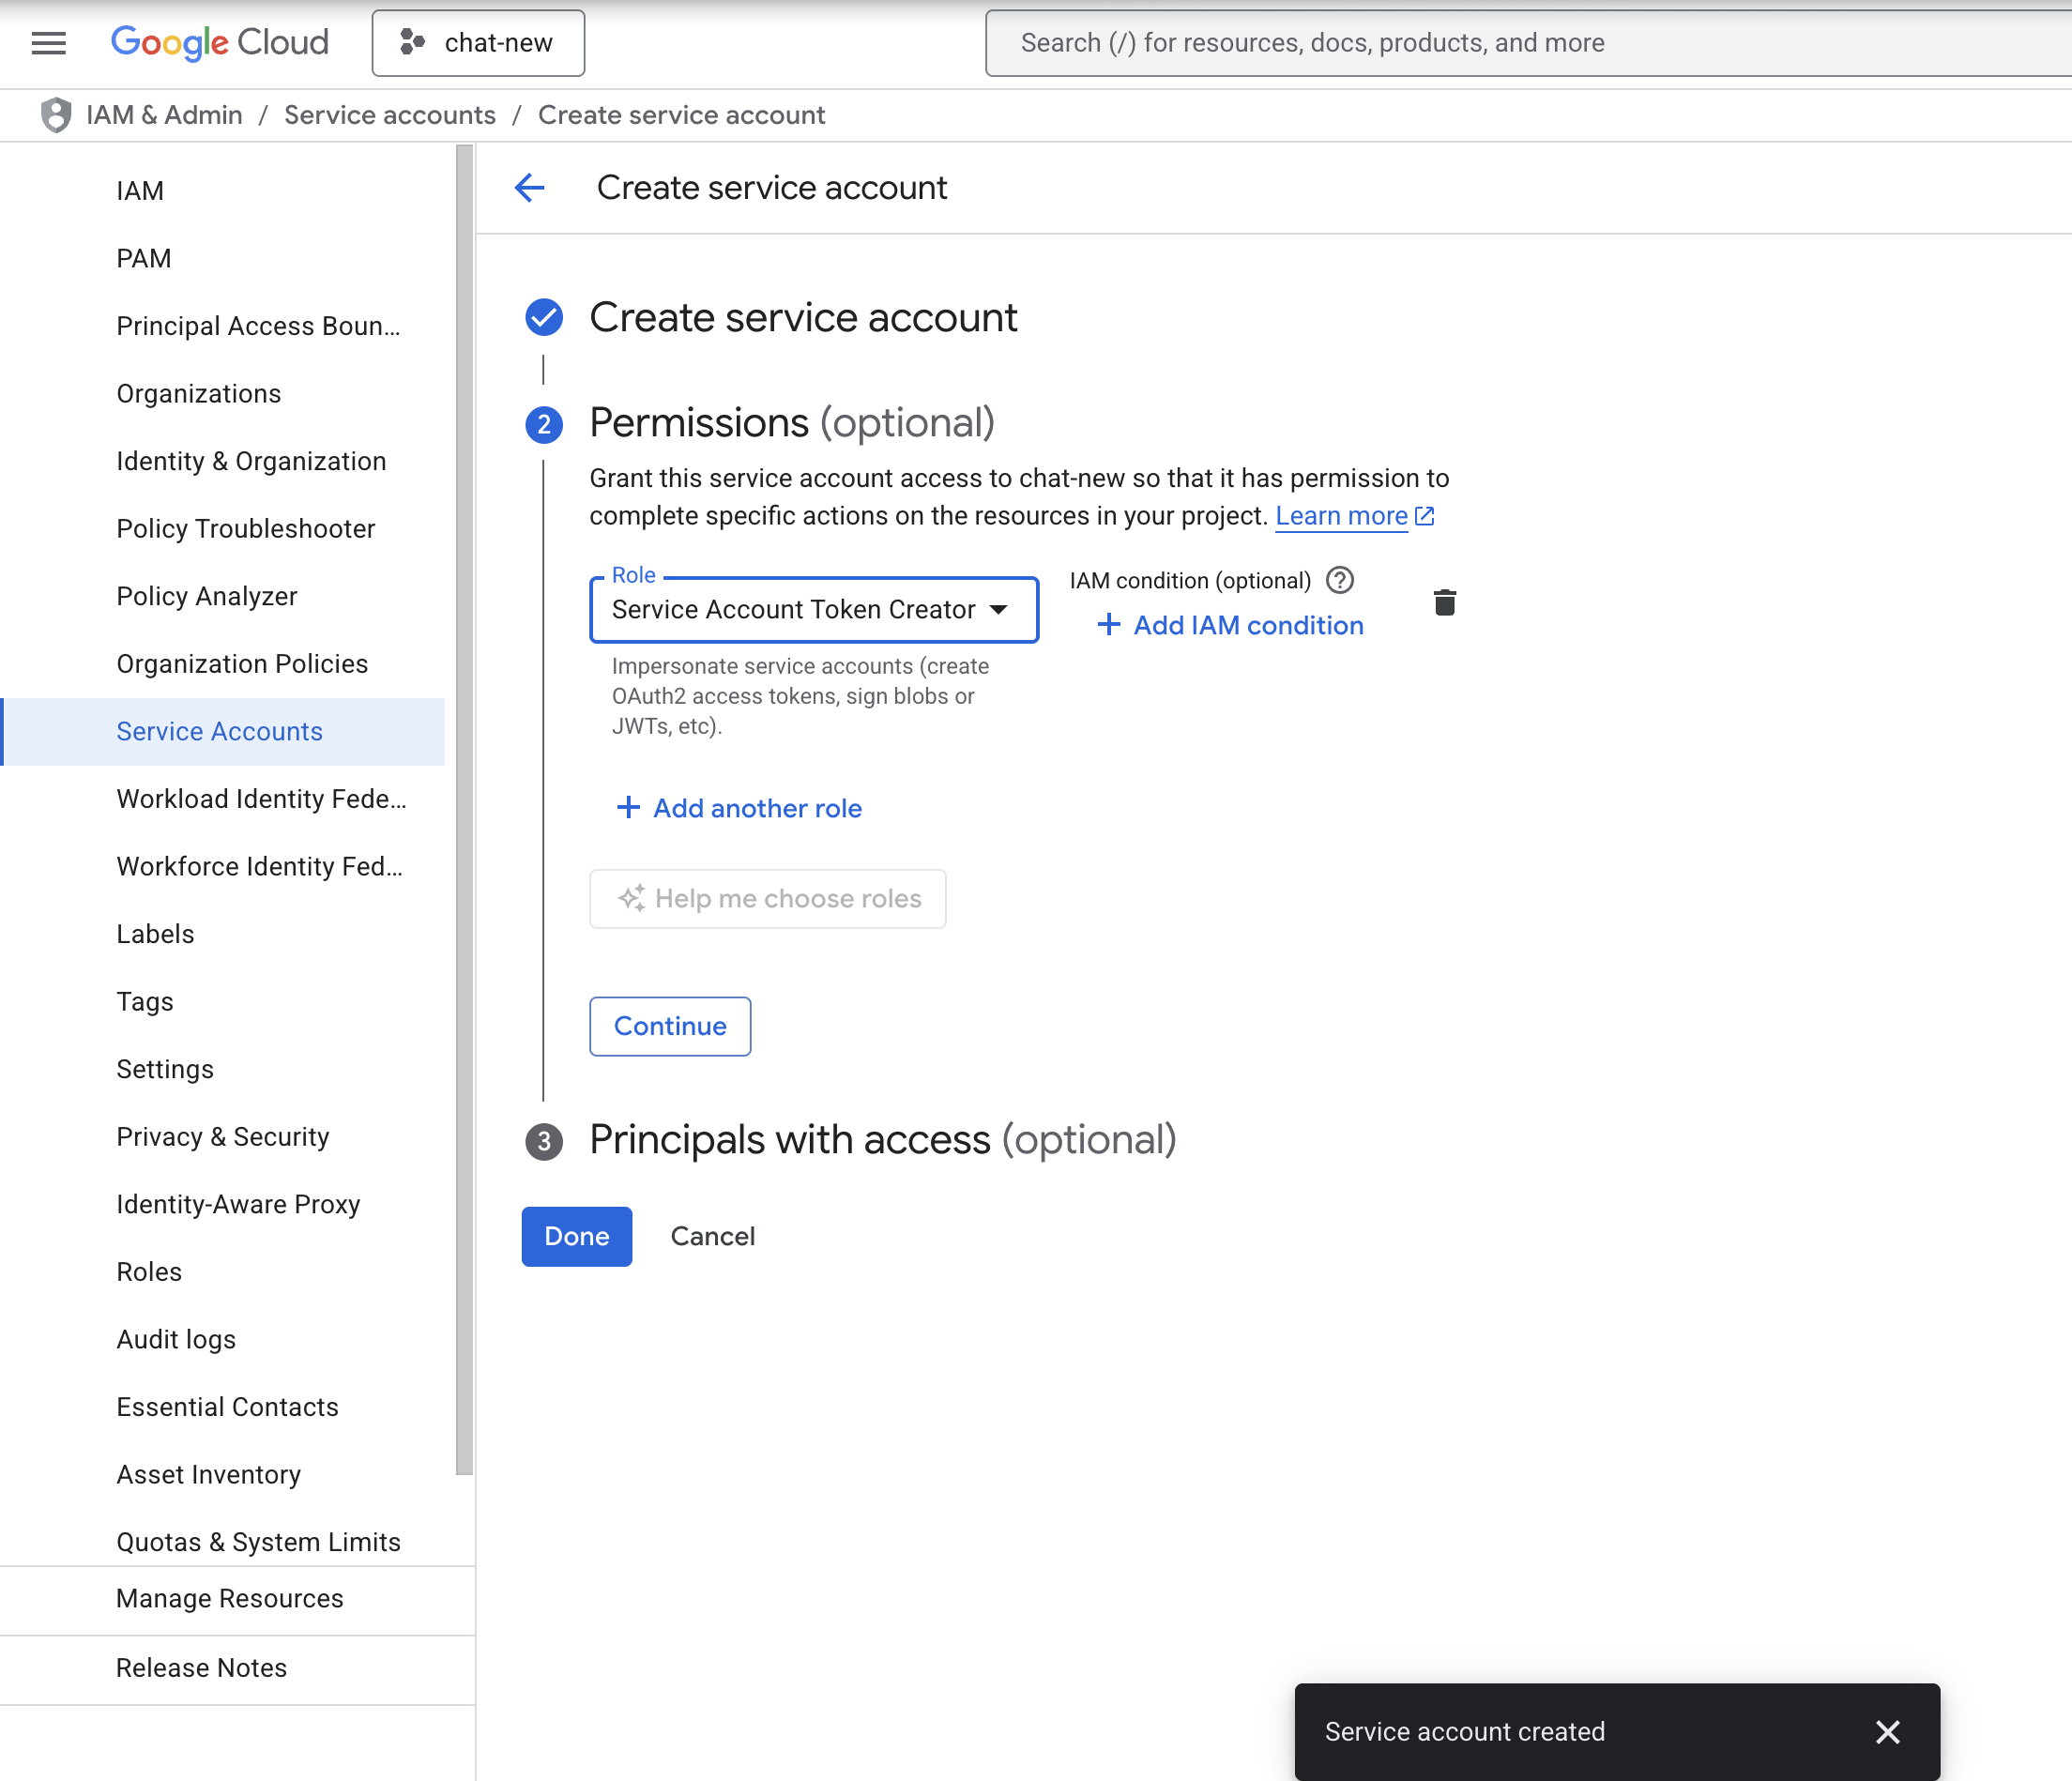
- Click CREATE SERVICE ACCOUNT Service Account is required to access the Google Chat API.
- While creating the service account, in Permissions add the role Service Account Token Creator and click on DONE.
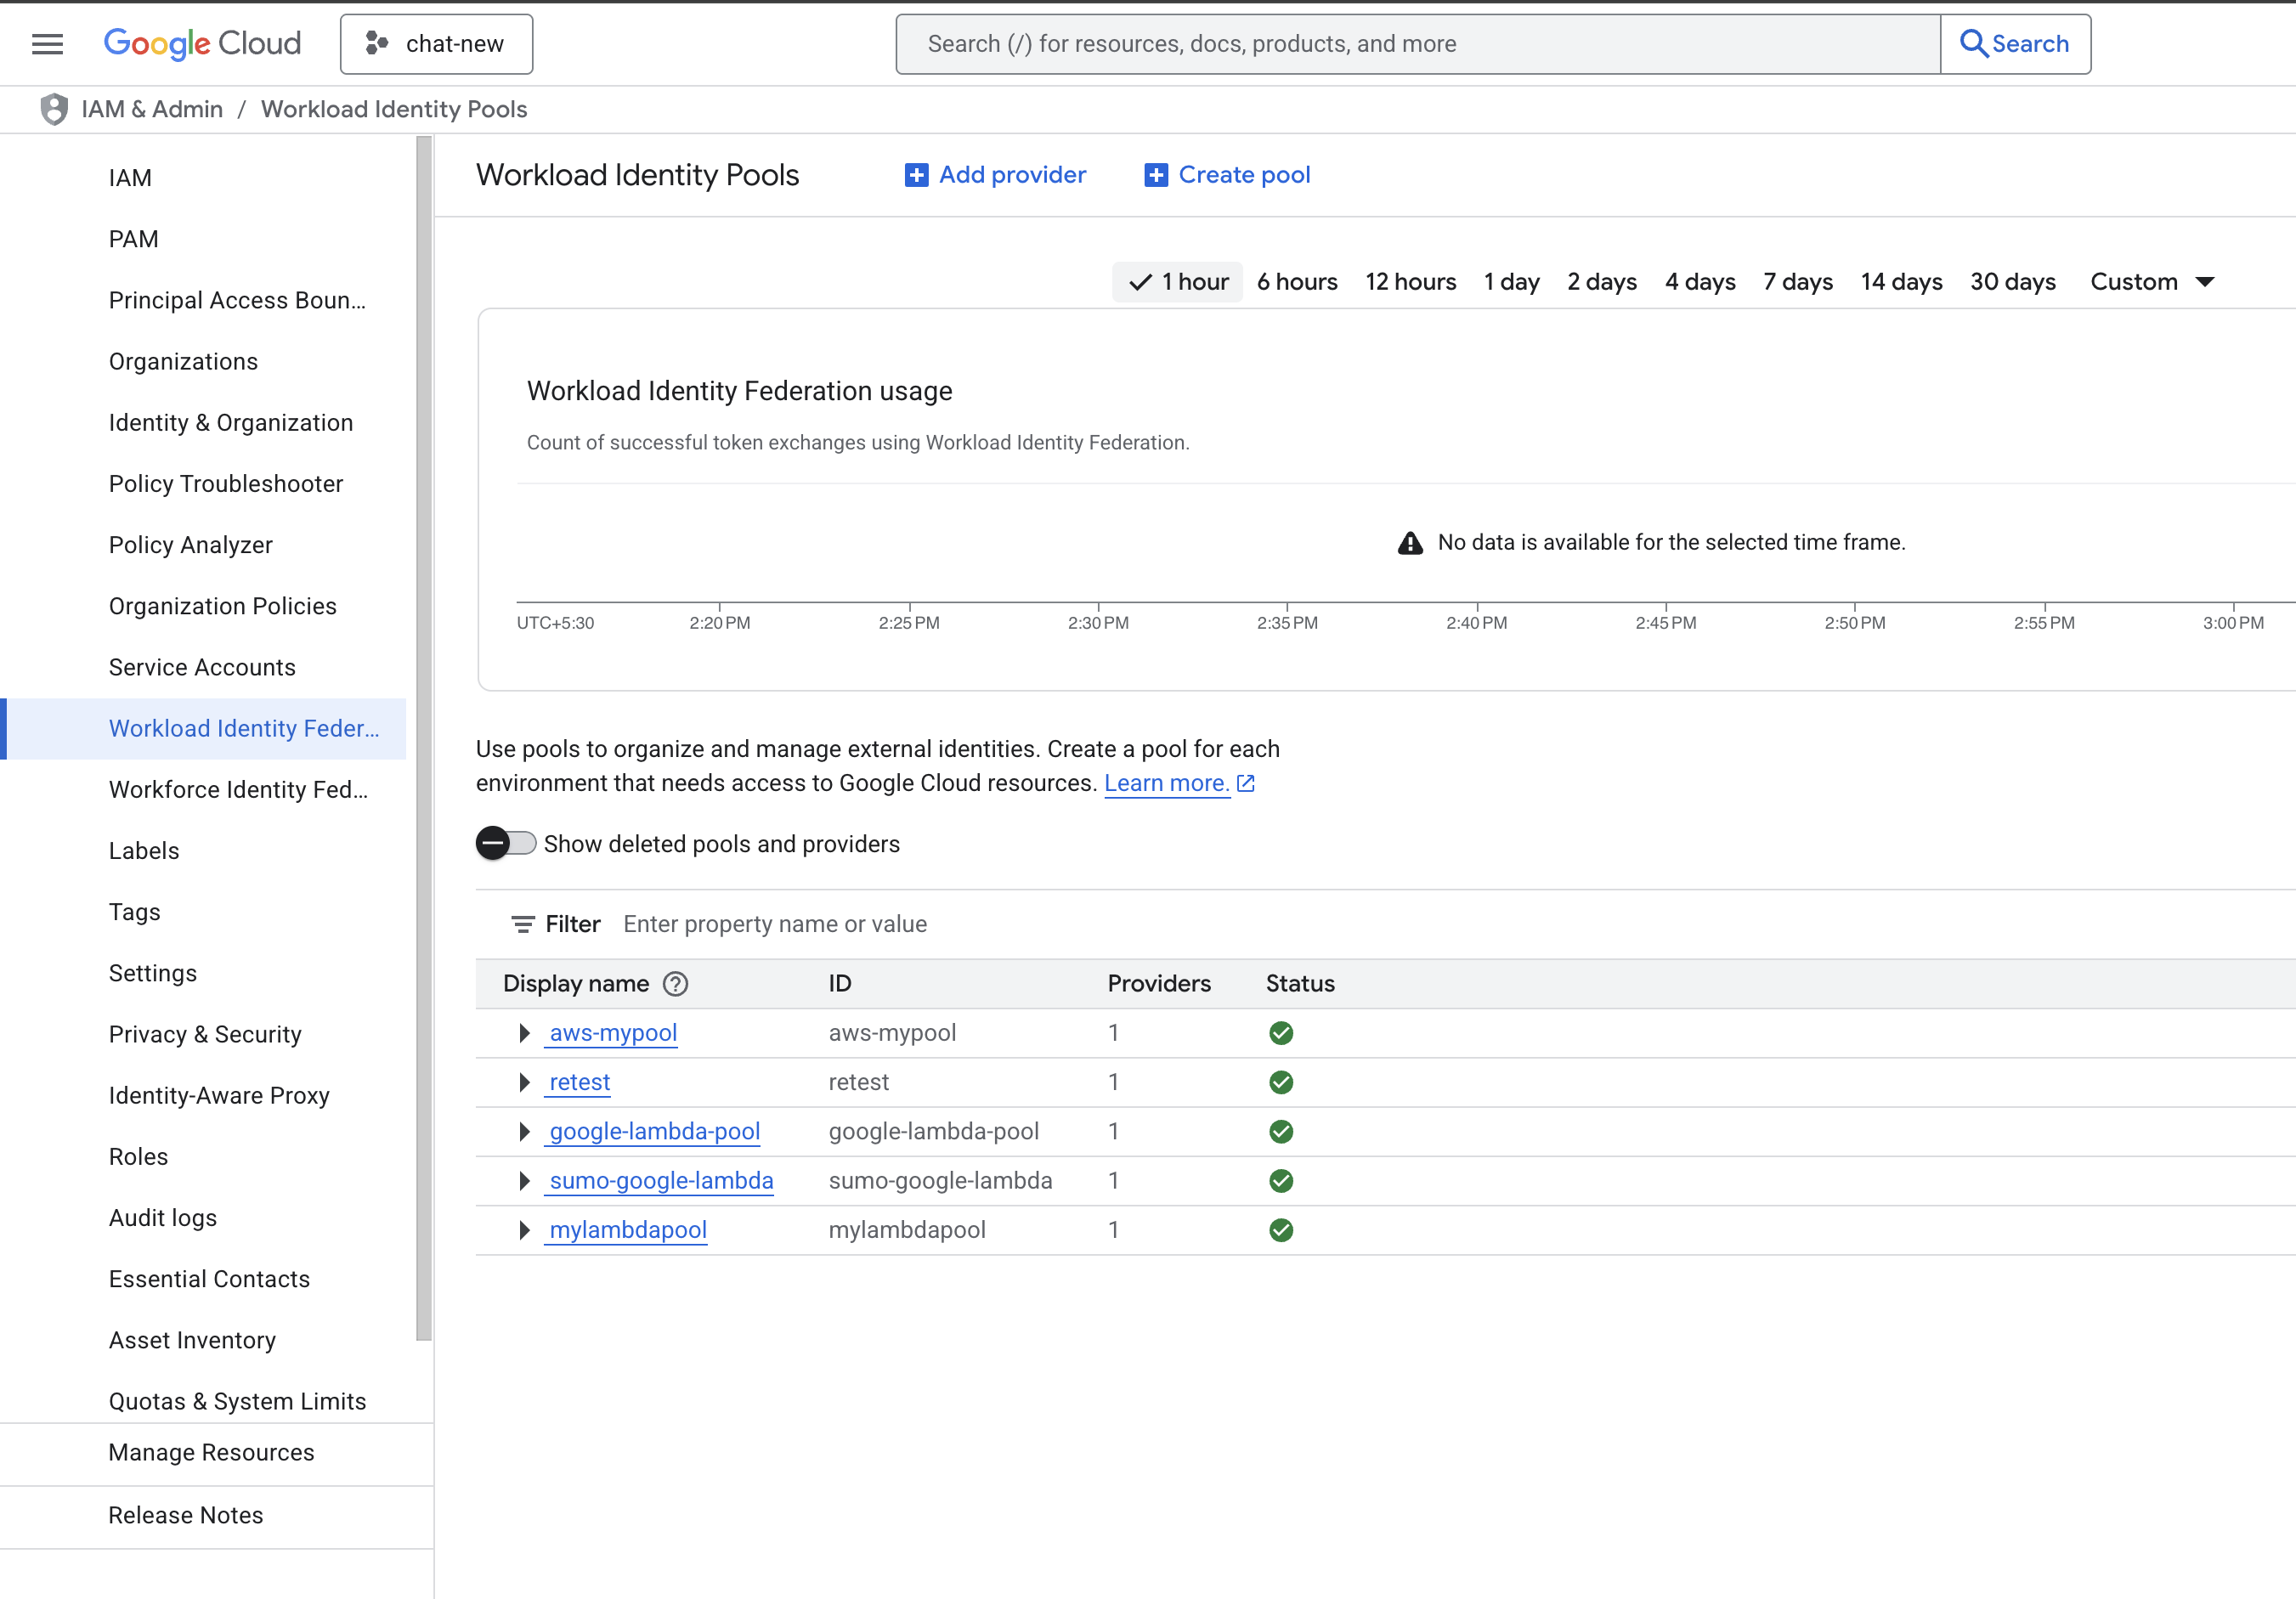
- Go to the IAM & Admin > Workload Identity Federation page.
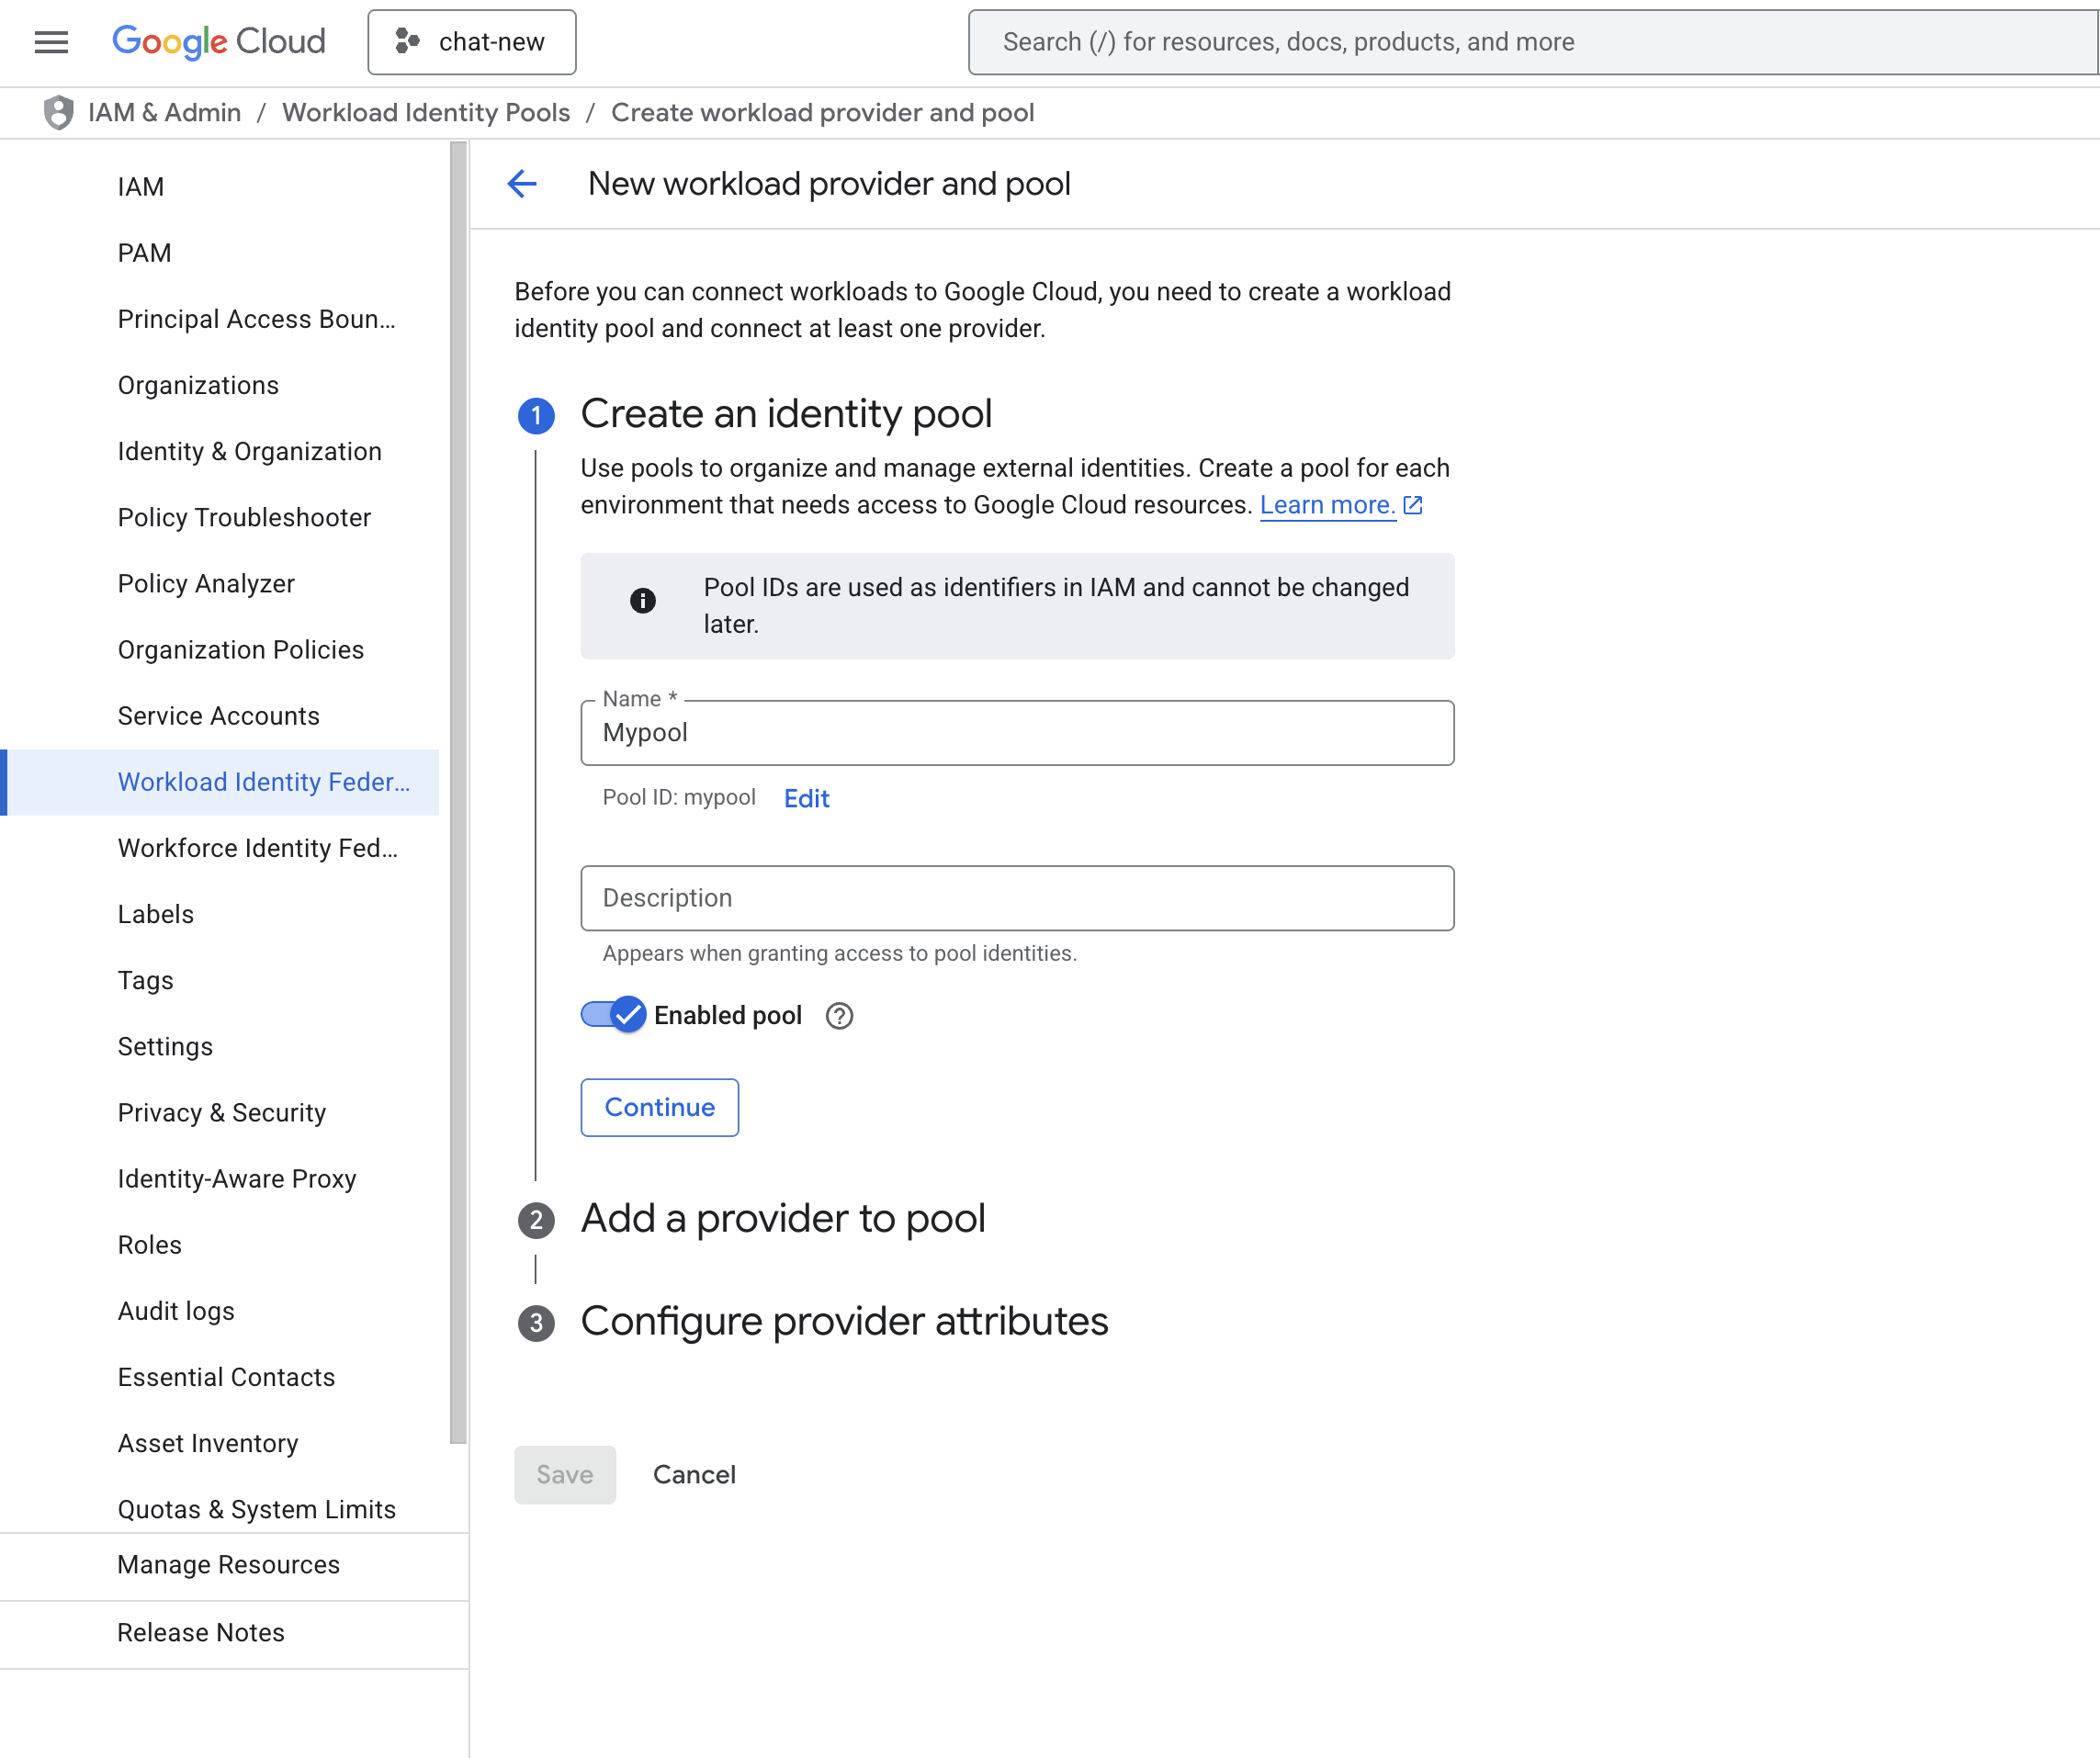
- Click CREATE POOL, provide the details, and click on CONTINUE.
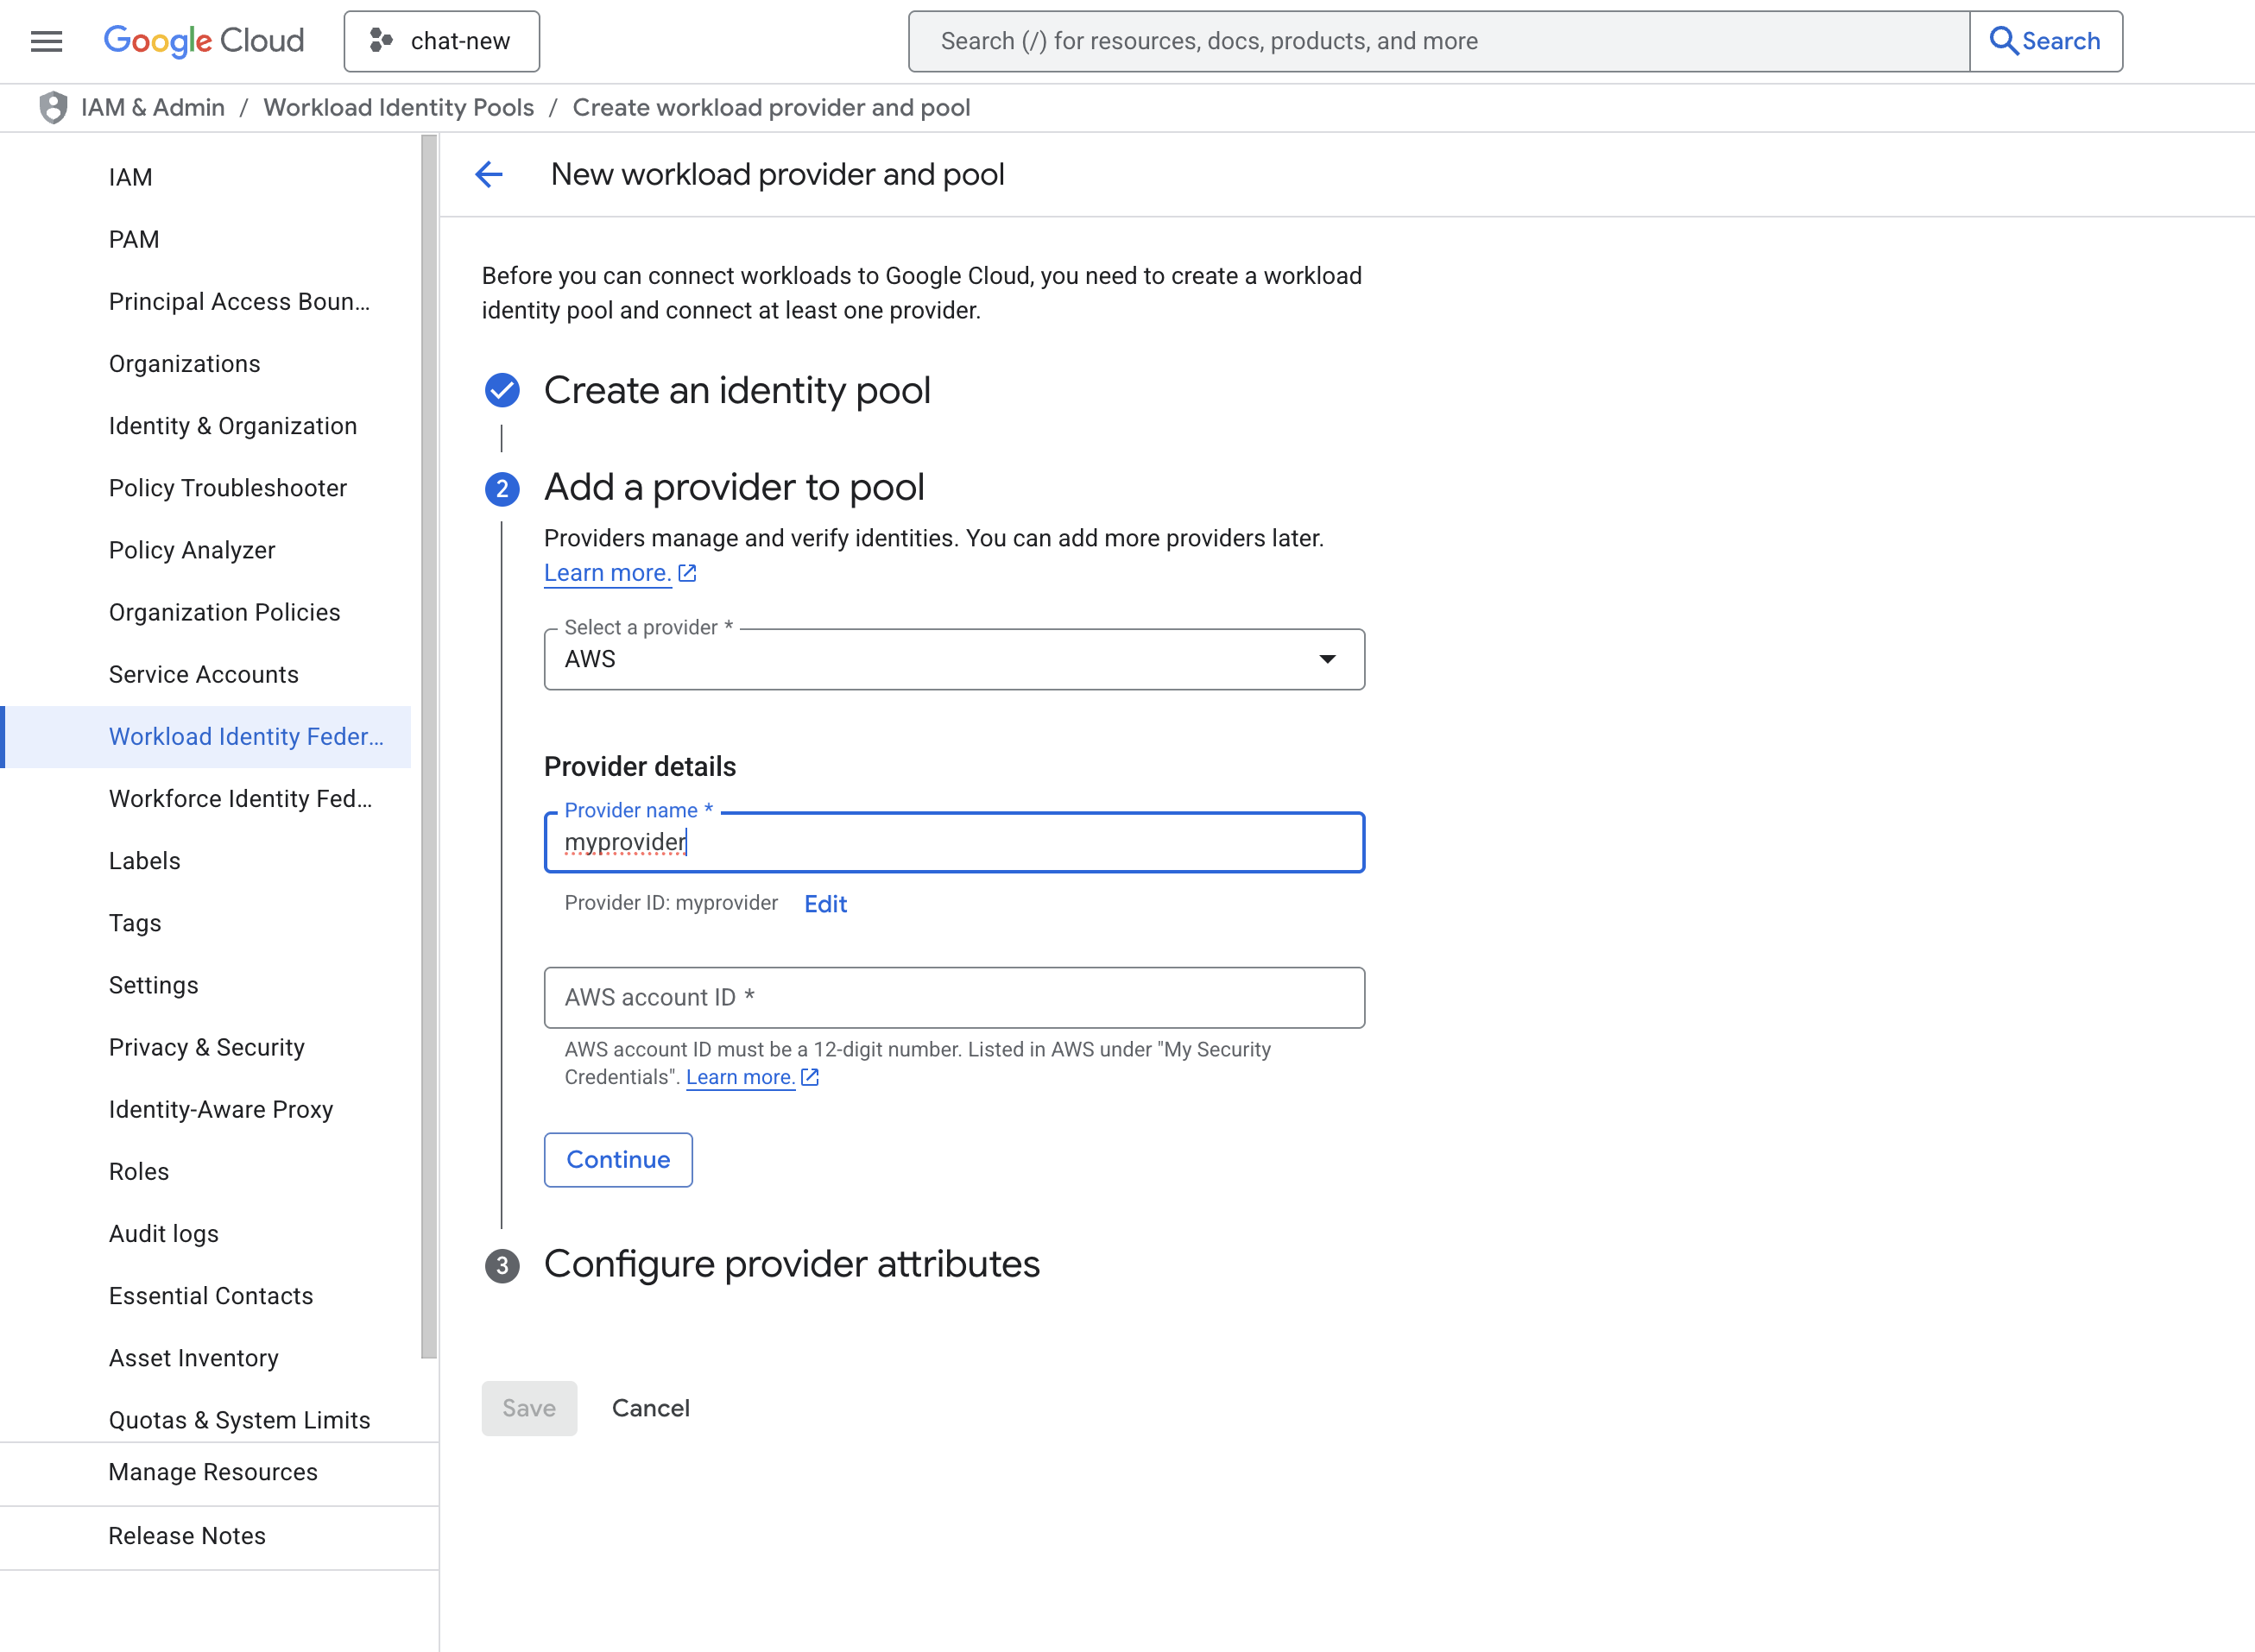
- Add Provider details. Select AWS as the provider type and provide the details of the AWS Account ID which is provided by Sumo Logic. Click on CONTINUE and SAVE.
- Now you will see the created pool and provider.
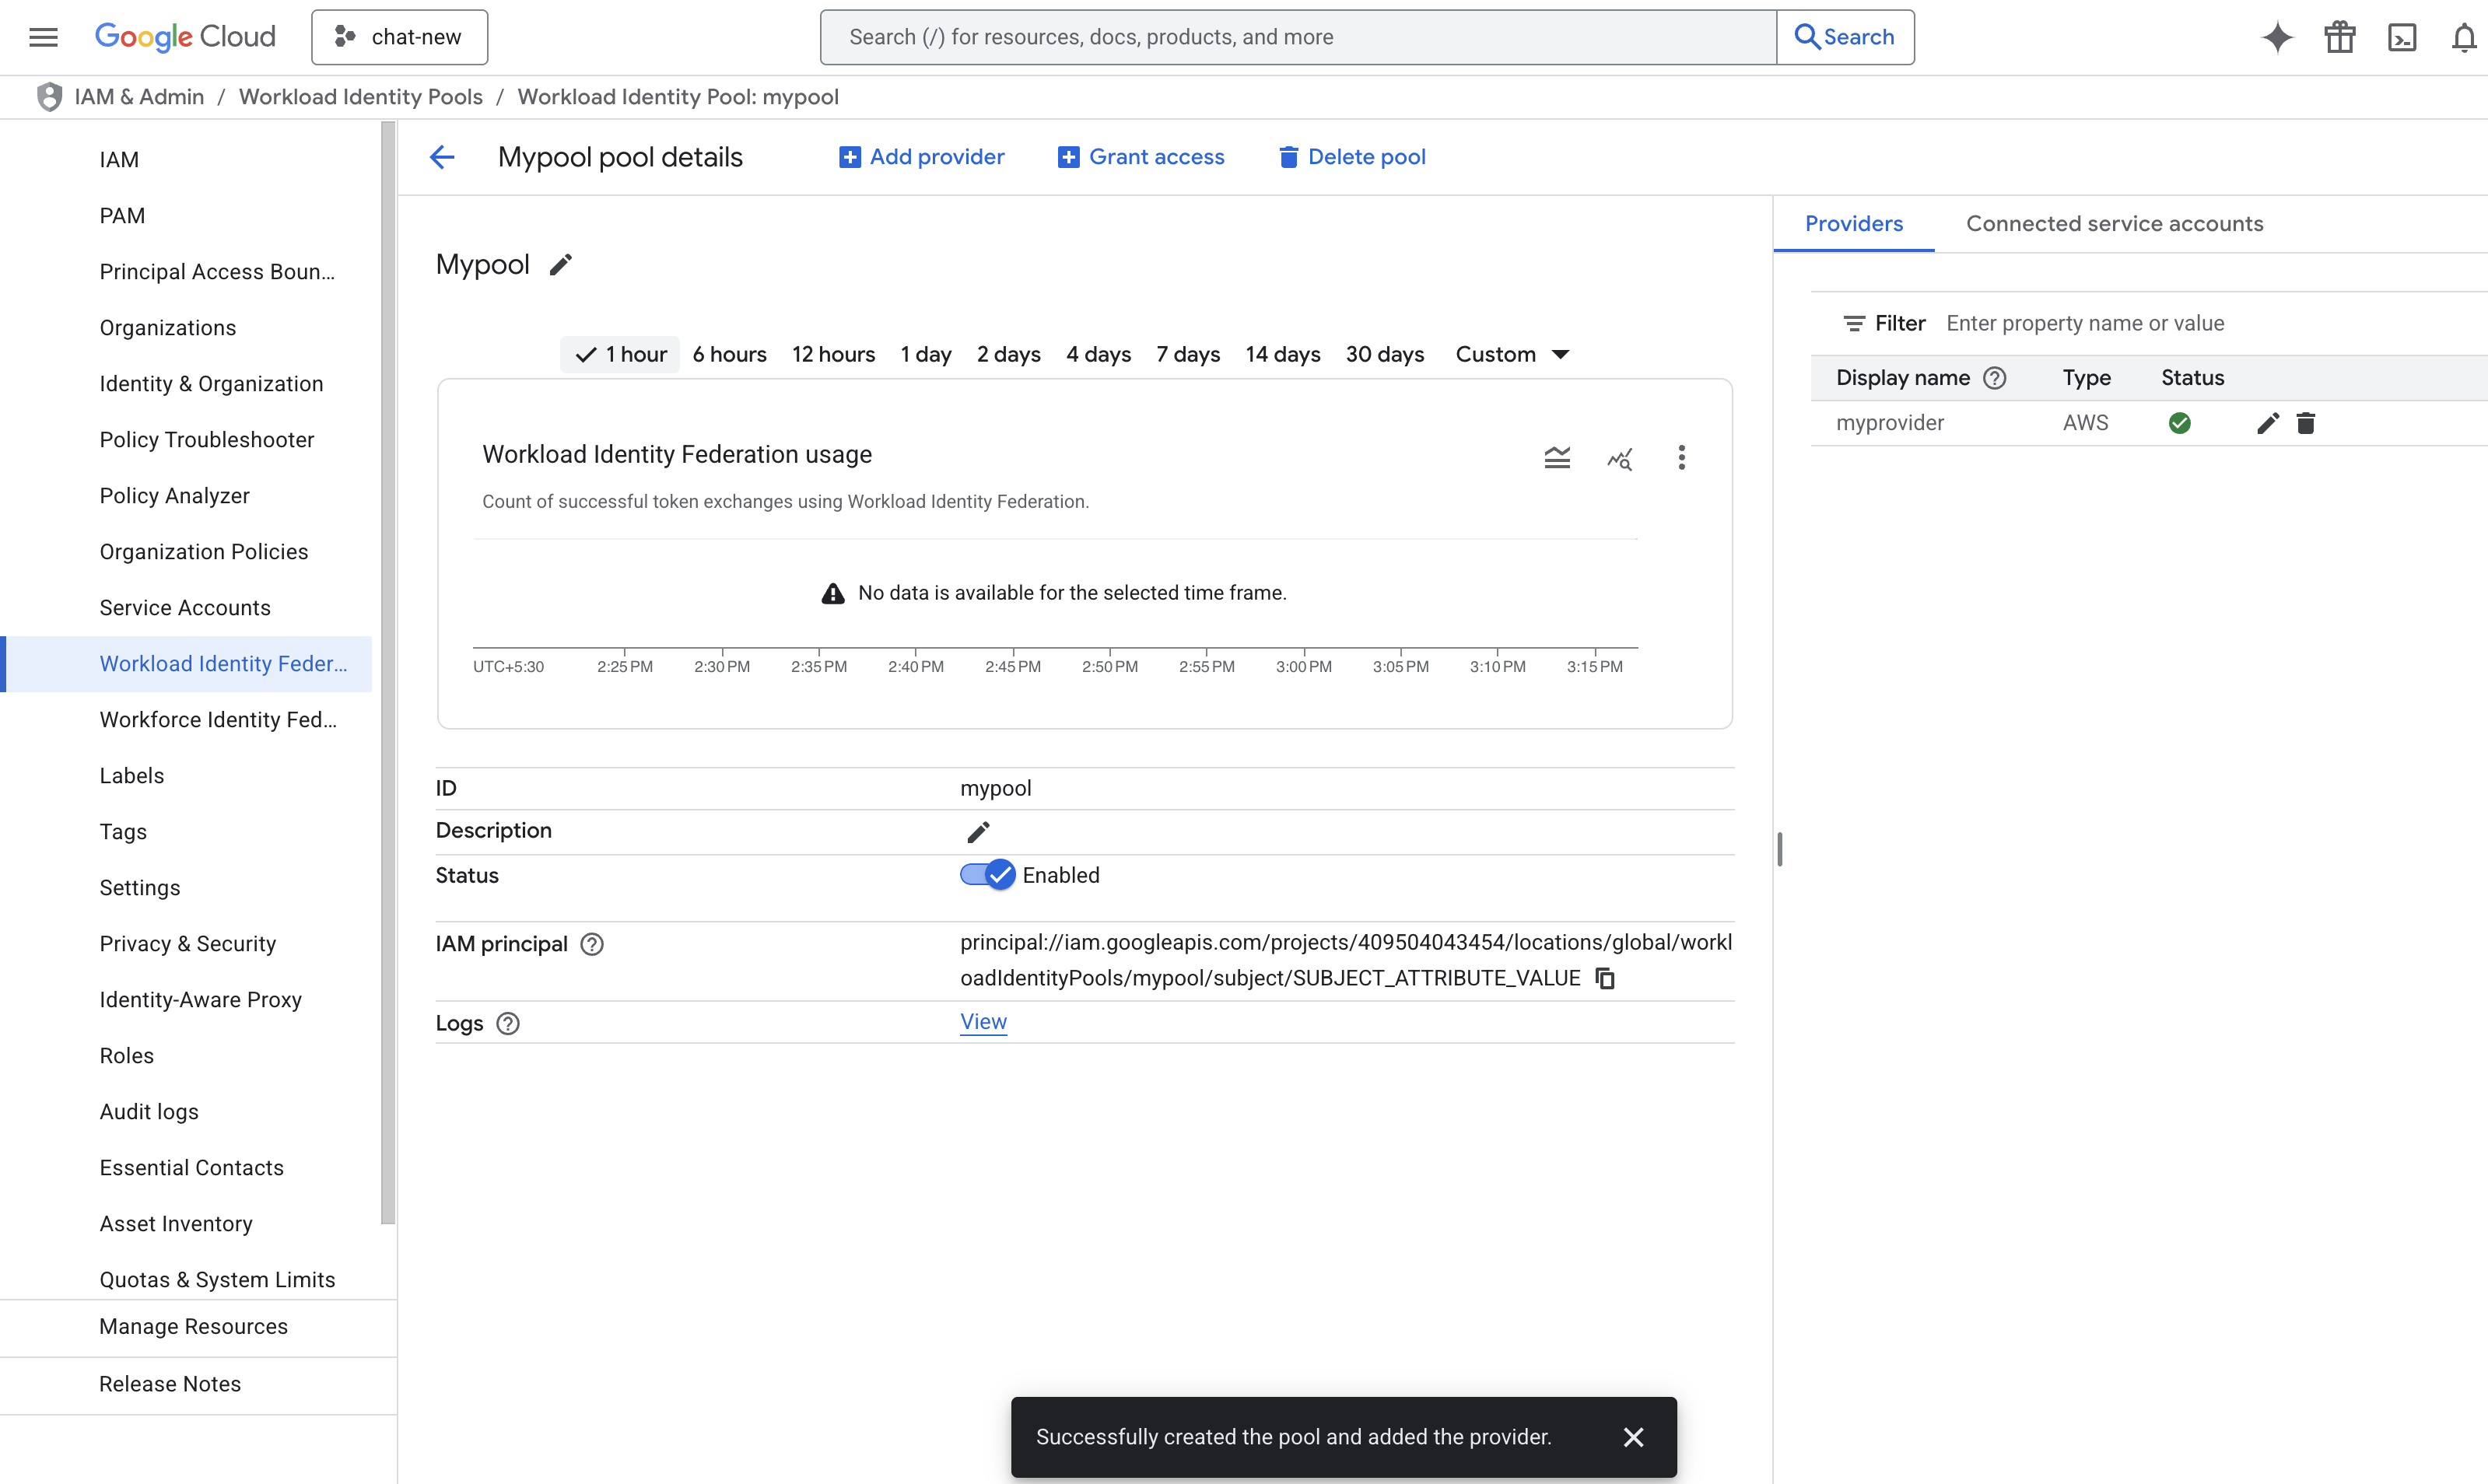
- Now we have to build a principal name to configure in Sumo Logic. The format of the principal name is:
principalSet://iam.googleapis.com/projects/{YourProjectID}/locations/global/workloadIdentityPools/{YourPoolName}/attribute.aws_role/arn:aws:sts::{SumoAWSAccountID}:assumed-role/{SumoAWSRole}/{SumoAWSLambdaFunction}. - Go to the IAM & Admin > IAM page and click on Grant Access to add a new principal.
- In the New principals field, provide the above principal name and select the role Workload Identity User. Click on SAVE.
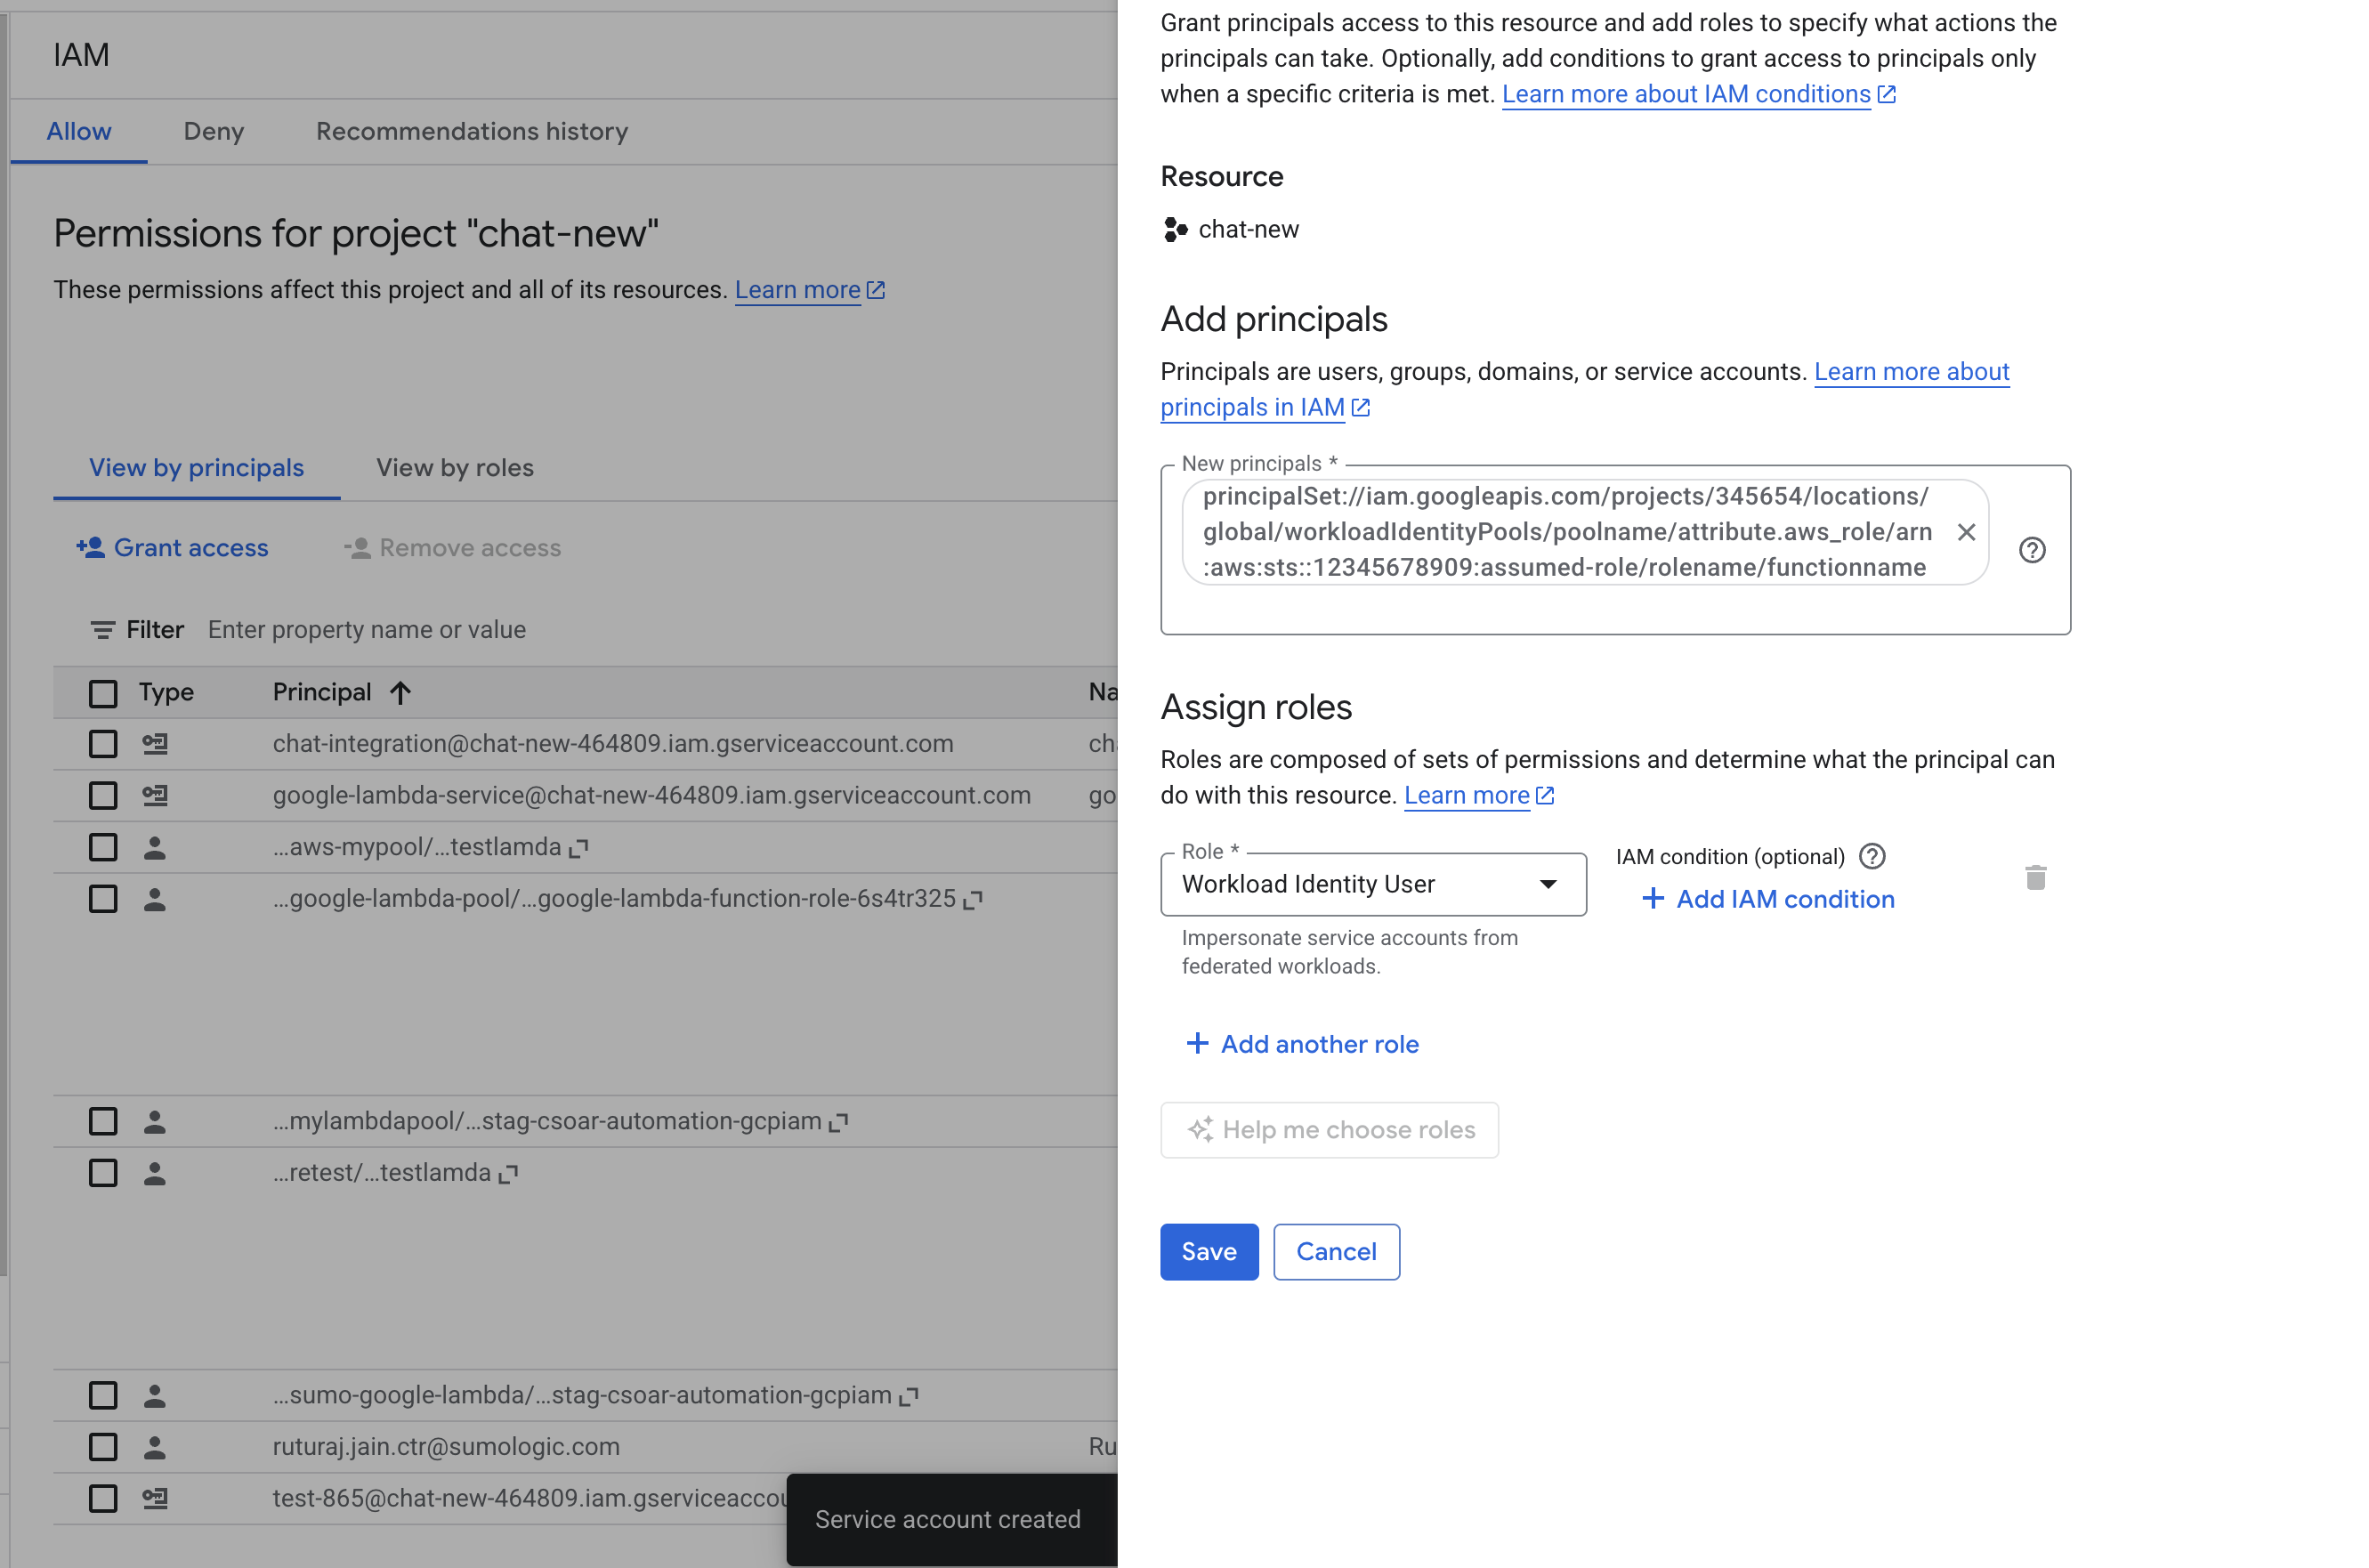
- Go to the IAM & Admin > Workload Identity Federation page and select the pool which was created above.
- Click on Grant Access > Grant access using service account impersonation.
- Select the service account which created above, select the principle as aws_role and provide the arn
arn:aws:sts::{SumoAWSAccountID}:assumed-role/{SumoAWSRole}and click on SAVE.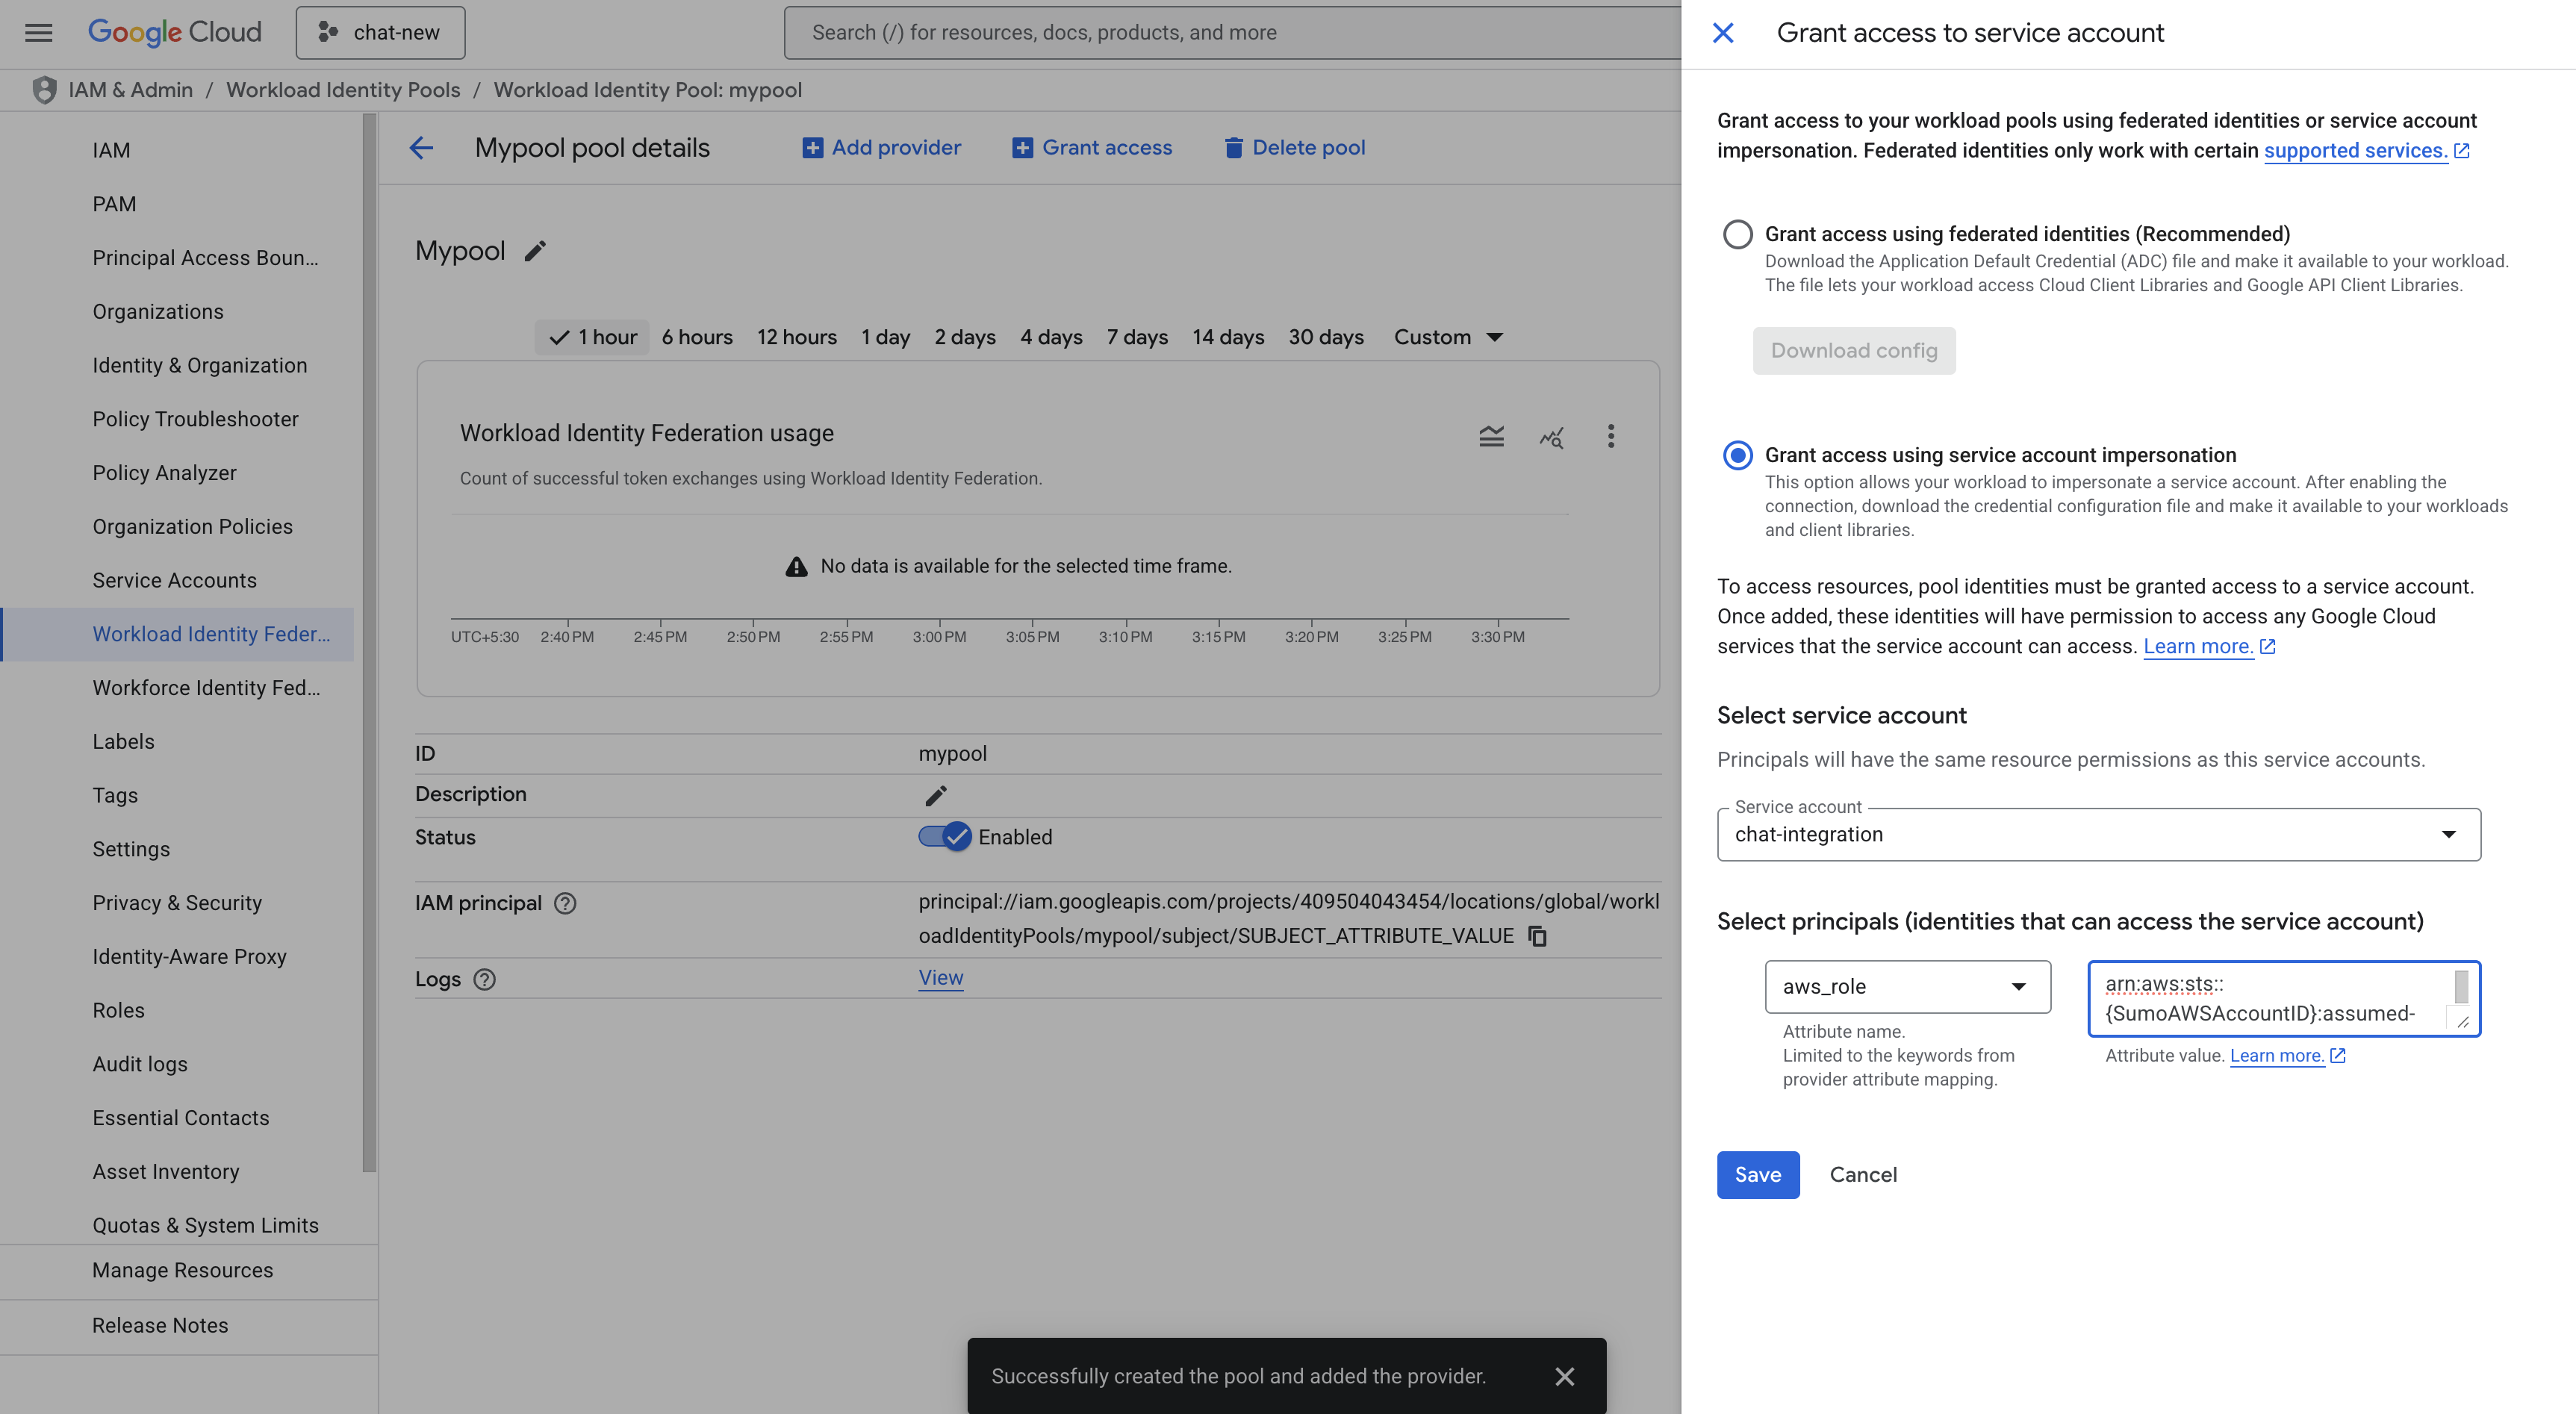
- Again go to Grant Access > Grant access using service account impersonation. Select the service account which was created above. Select the principle as
aws_roleand provide the arnarn:aws:sts::{SumoAWSAccountID}:assumed-role/{SumoAWSRole}/{SumoAWSLambdaFunction}. Click on SAVE. - Download the WIF
conf.jsonfile. Make sure you save it in a safe place. Use the JSON content to configure the Google Chat integration to use WIF authentication in Automation Service and Cloud SOAR. - To configure the app in Google Chat API, go to APIs & Services, select Google Chat API, and in CONFIGURATION provide the details and click on SAVE.
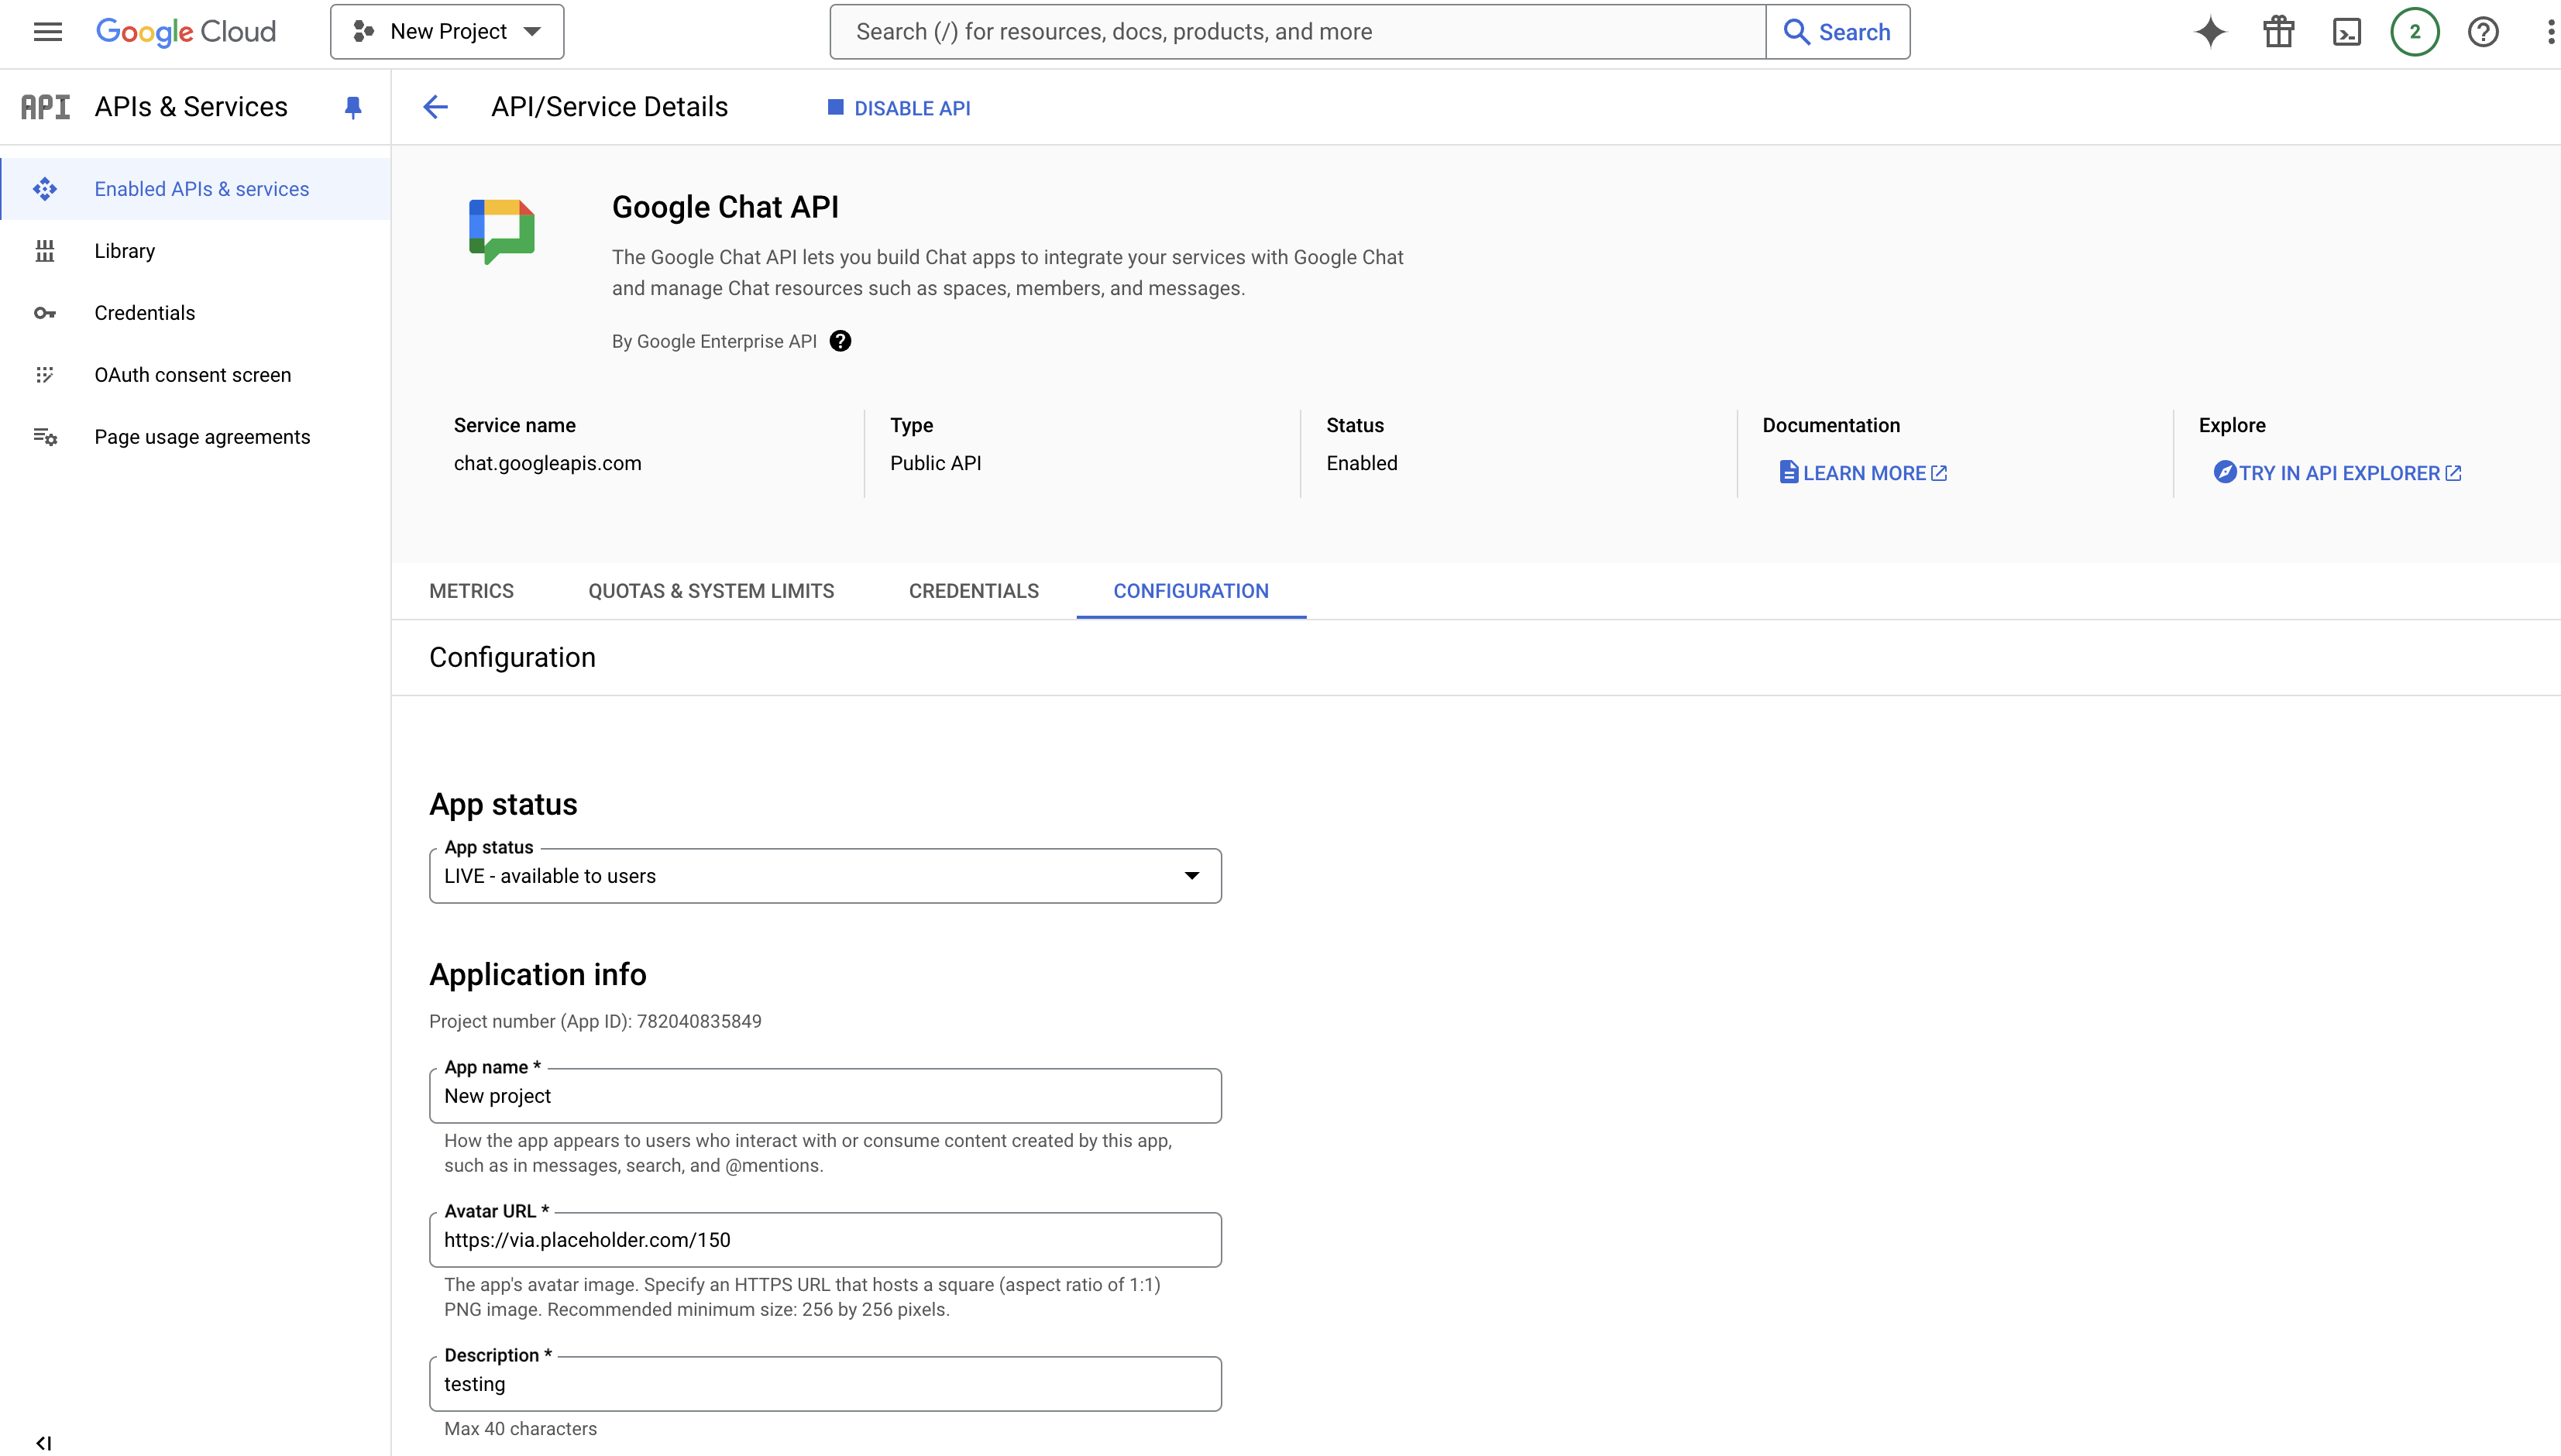
- Go to the Google Chat App and add the above app in that. Also, to add above app in space, go to space and in Apps & integration add the app.
Service Account authentication
To create service account credentials in Google Workspace needed to configure the Google Chat app integration, follow these steps:
- Log in to the Google Cloud portal.
- Select a Google Cloud project (or create a new one).
- Go to the API&Services > Credentials page.
- In the same page click on ENABLES API AND SERVICES and search for Google Chat and enable it.
- Click CREATE CREDENTIALS and select Service Account.
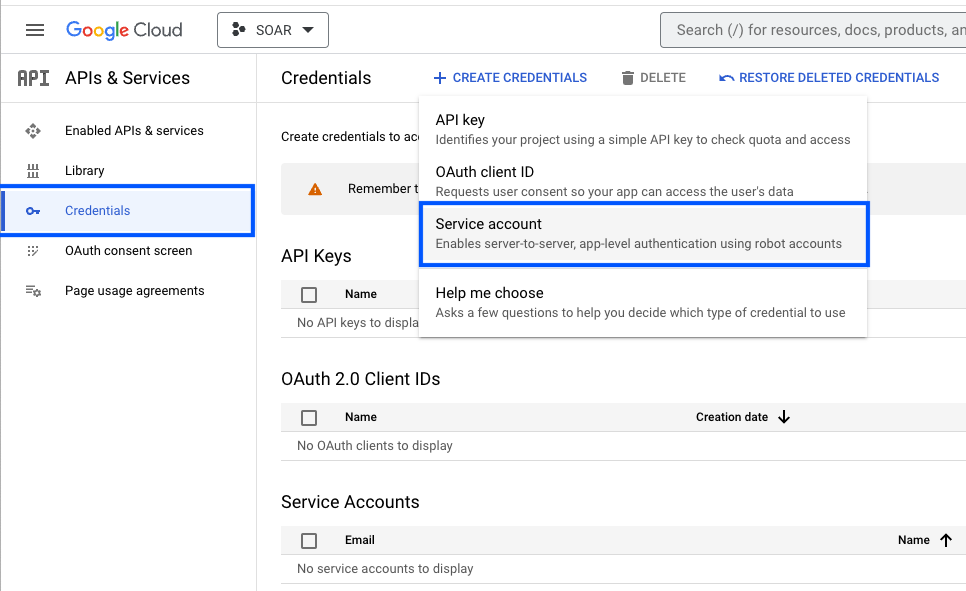
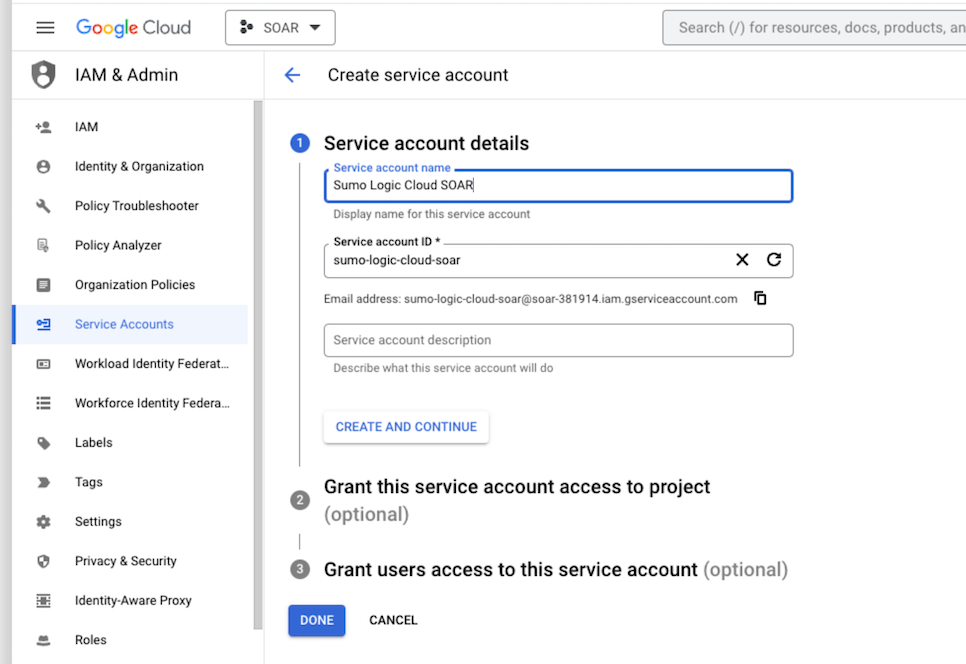
- Enter a service account name to display in the Google Cloud console. The Google Cloud console generates a service account ID based on this name.
- (Optional) Enter a description of the service account.
- Skip two optional grant permissions steps and click Done to complete the service account creation.
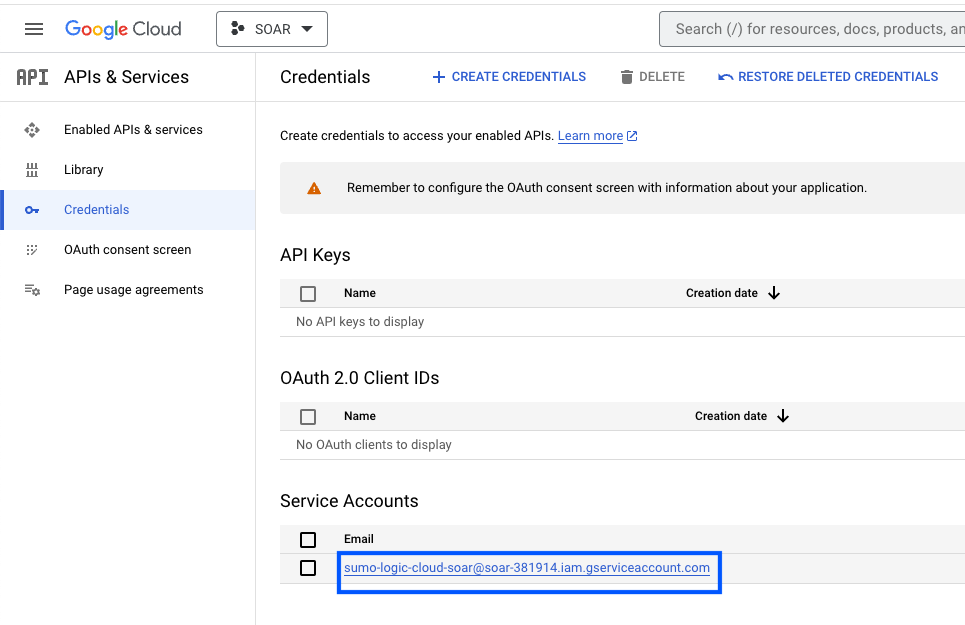
- Click on the generated service account to open the details.
- Under the KEYS tab, click ADD KEY and choose Create new key.
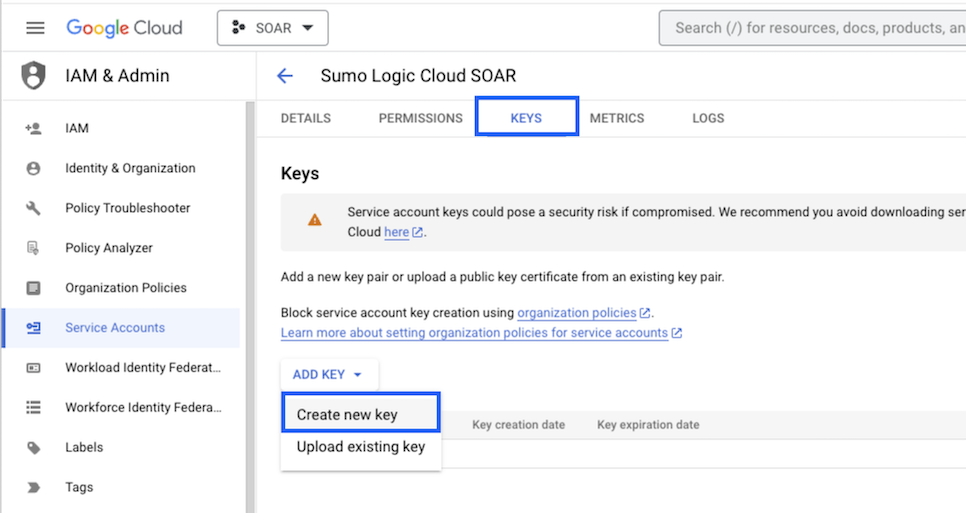
- Click on CREATE (make sure JSON is selected).
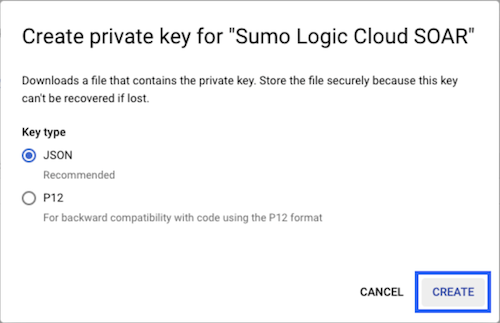
- The JSON file is downloaded. Make sure you save it in a safe place.
- To configure the app in Google Chat API, go to APIs & Services, select Google Chat API, and in CONFIGURATION provide the details and click on SAVE.

- Go to the Google Chat App and add the above app in that. Also, to add above app in space, go to space and in Apps & integration add the app.
Configure Google Chat in Automation Service and Cloud SOAR
Before you can use this automation integration, you must configure its authentication settings so that the product you're integrating with can communicate with Sumo Logic. For general guidance, see Configure Authentication for Automation Integrations.
How to open the integration's configuration dialog
- Access App Central and install the integration. (You can configure at installation, or after installation with the following steps.)
- Go to the Integrations page.
Classic UI. In the main Sumo Logic menu, select Automation and then select Integrations in the left nav bar.
New UI. In the main Sumo Logic menu, select Automation > Integrations. You can also click the Go To... menu at the top of the screen and select Integrations. - Select the installed integration.
- Hover over the resource name and click the Edit button that appears.
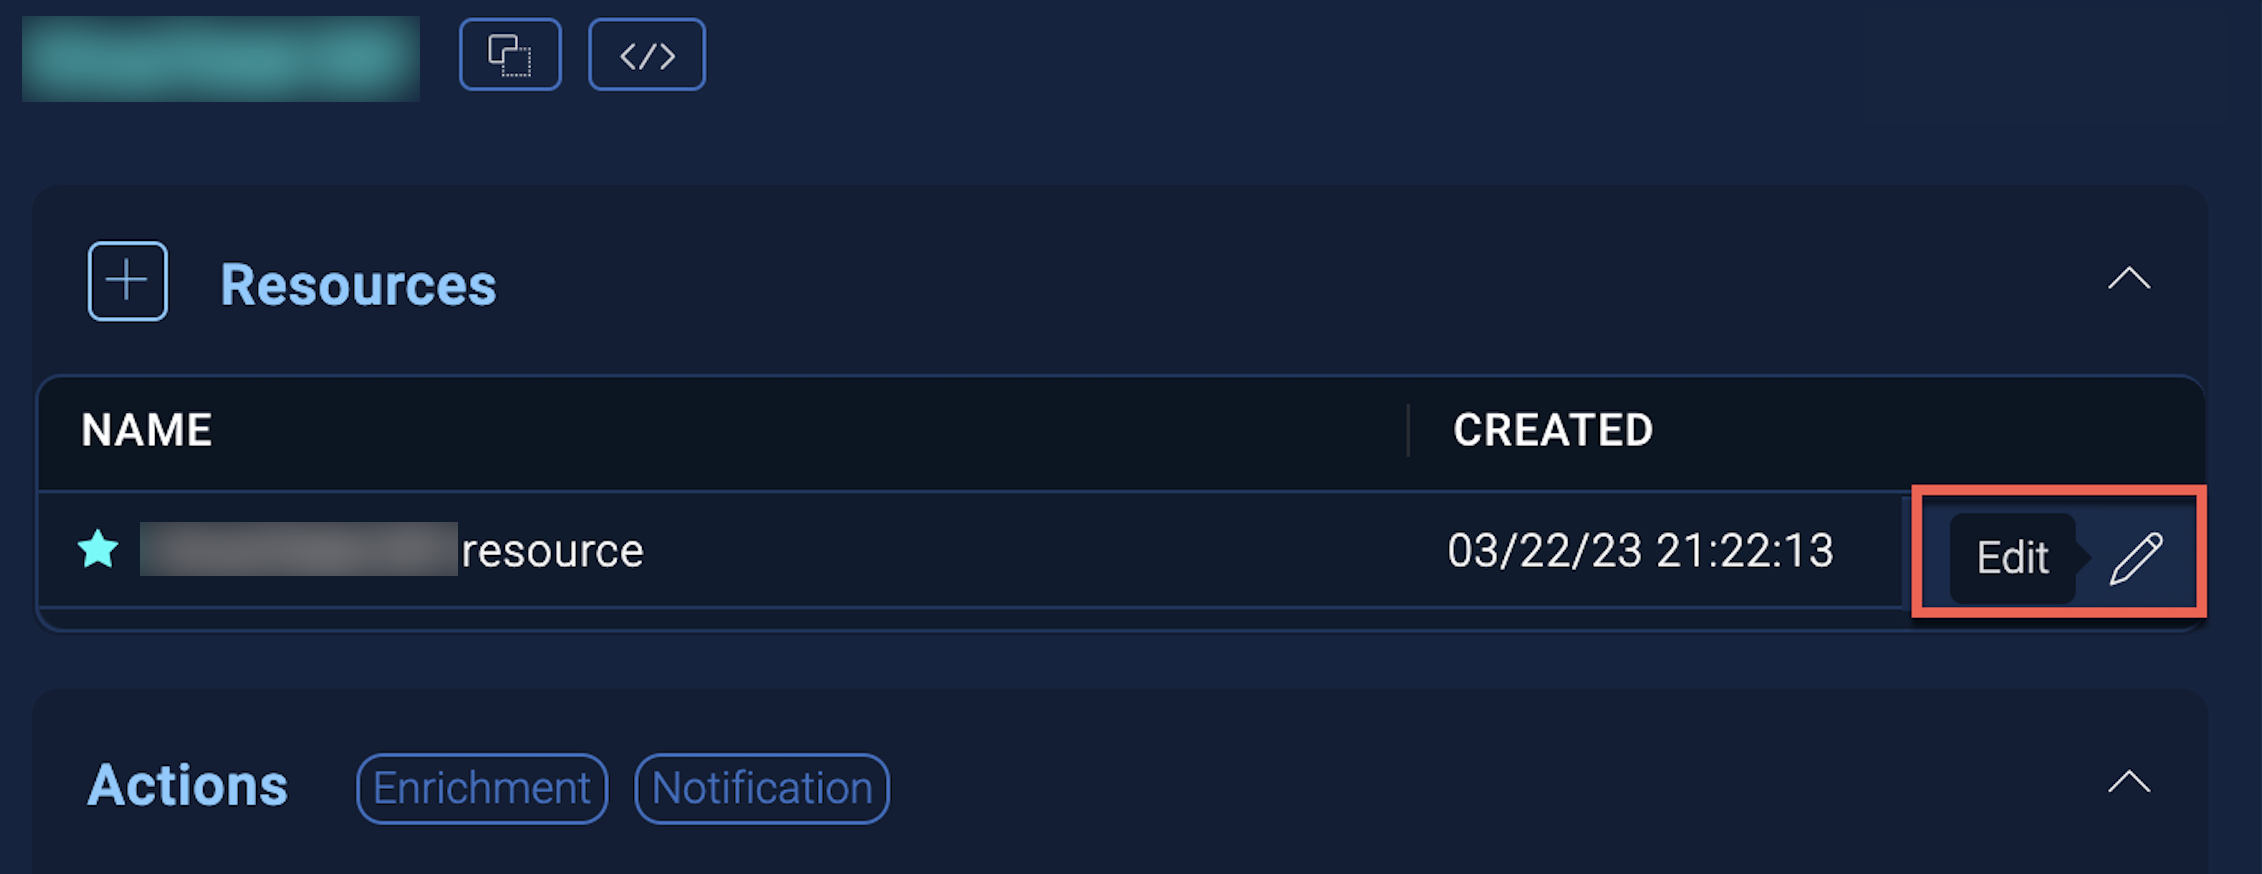
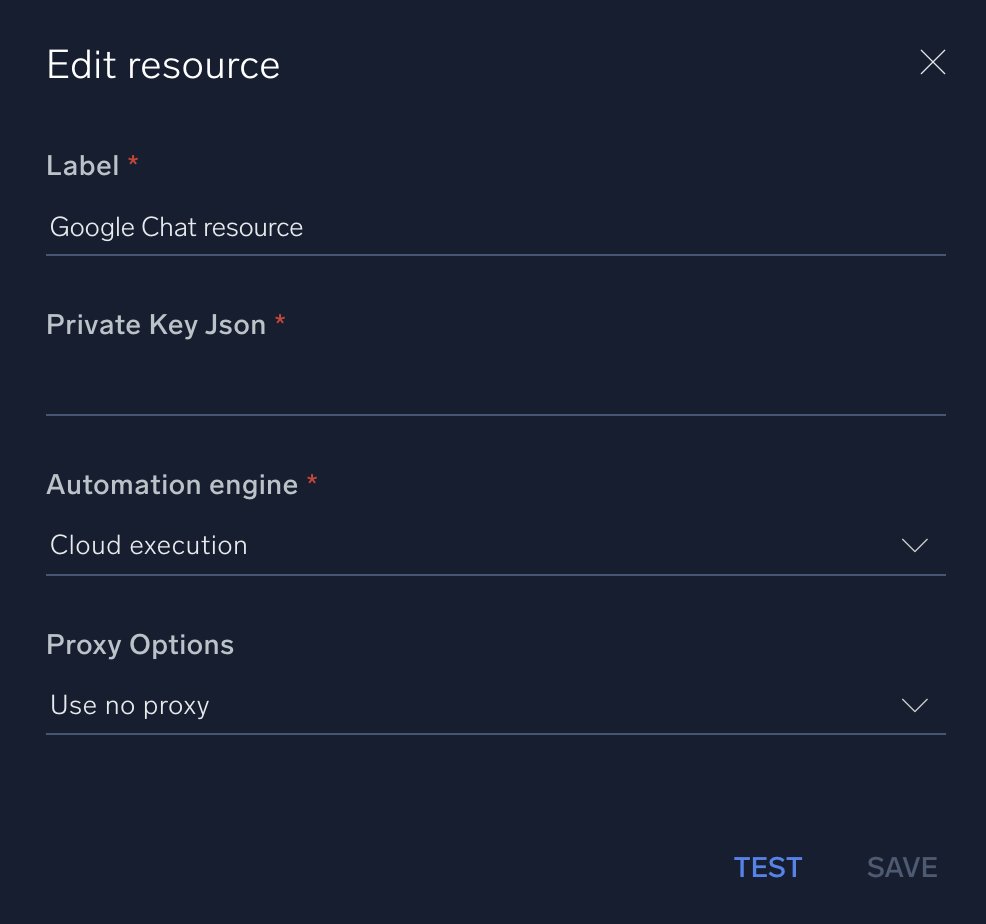
In the configuration dialog, enter information from the product you're integrating with. When done, click TEST to test the configuration, and click SAVE to save the configuration:
-
Label. Enter the name you want to use for the resource.
- Provide the Service Account Private Key Json or WIF Private Key Json based on your configuration.
- scopes. Default scope is already added as
https://www.googleapis.com/auth/chat.bot, if not then add this scope. -
Automation Engine. Select Cloud execution for this certified integration. Select a bridge option only for a custom integration. See Cloud or Bridge execution.
-
Proxy Options. Select whether to use a proxy. (Applies only if the automation engine uses a bridge instead of cloud execution.)
- Use no proxy. Communication runs on the bridge and does not use a proxy.
- Use default proxy. Use the default proxy for the bridge set up as described in Using a proxy.
- Use different proxy. Use your own proxy service. Provide the proxy URL and port number.
For information about Google Chat, see Google Chat documentation.
Use cases for sending messages
Disable HTML
Send plain text messages with HTML formatting disabled. 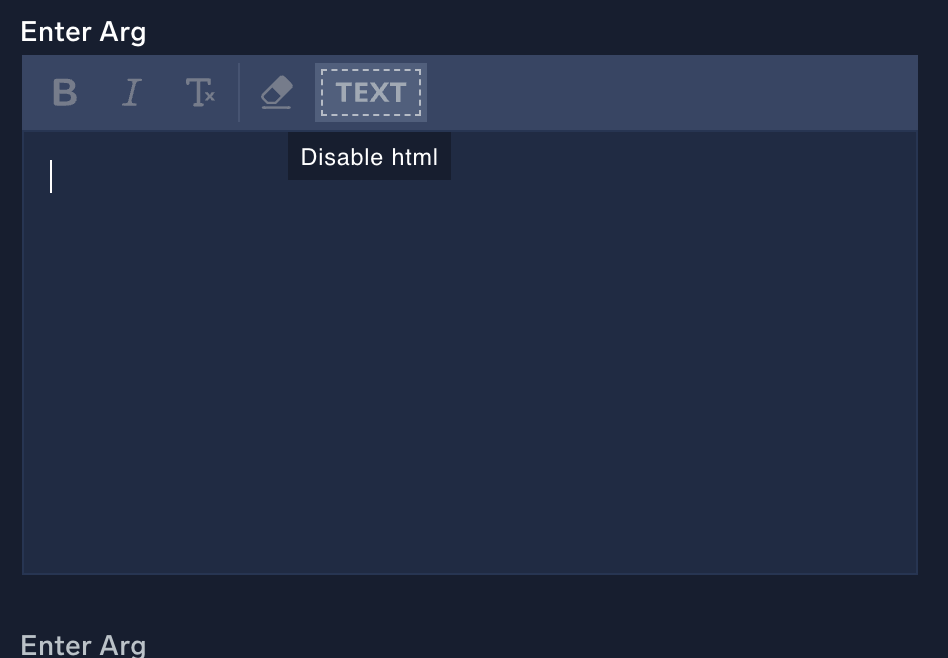
Compose rich text messages
Format your messages with rich text using Google Chat Rich Text Message. This allows you to enhance message readability with structured formatting options. 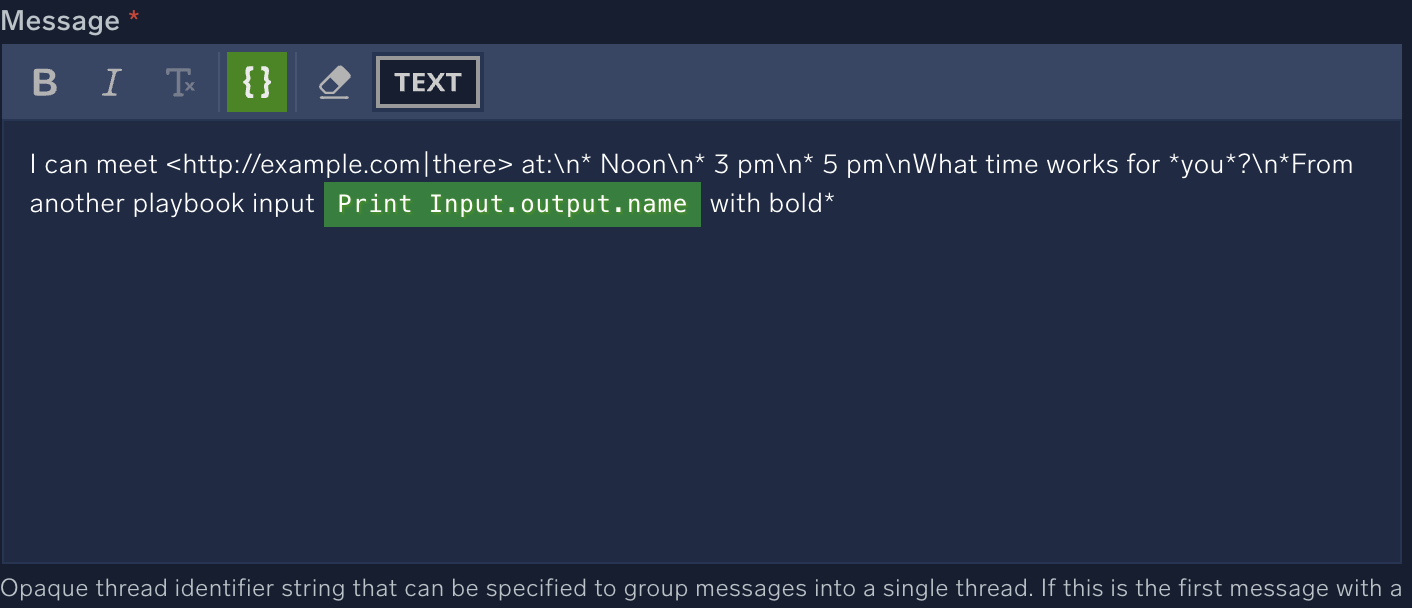
Receive notifications
Use Google Chat to receive notifications, ensuring you promptly get important updates or alerts. Notifications will be displayed in a well-formatted text, making them easy to read and understand in Google Chat. 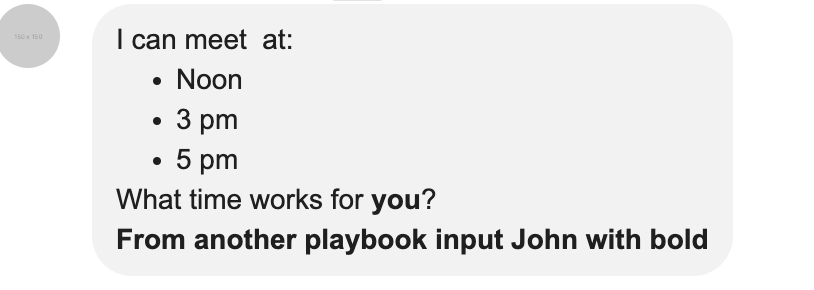
Change Log
- August 27, 2024 (v2.0) - First upload
- October 29, 2024 (v2.0) - Updated the docs
- December 06, 2024 (v2.1) - Added the Rich Text Message support in the Create Message action
- September 25, 2025 (v2.2) - Updated the WIF configuration steps